search the web

Showing posts with label Rice Varieties. Show all posts

Monday 18 September 2017

Mushroom Soy Chunks Biryani / Protein Rich Biryani / Soy Chunks Mushroom Biryani

Mushroom Soy Chunks Biryani / Protein Rich Biryani / Soy Chunks Mushroom Biryani


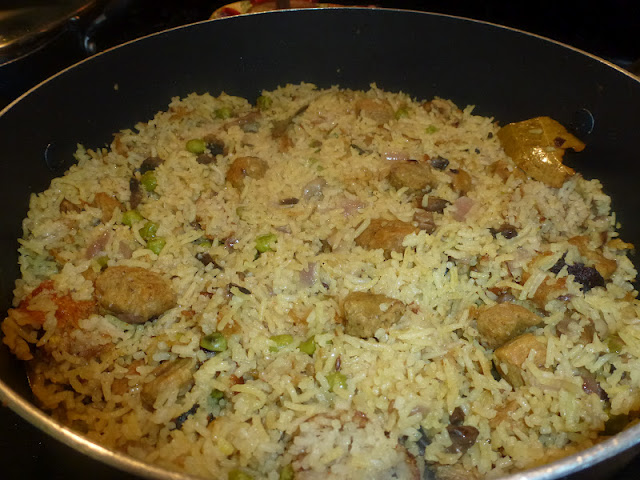
Both Mushrooms and Soy Chunks are powerhouse of good protein, their individual powers vary. Mushrooms are used in many cuisines in the world now due to its flavour and health benefits. Its an idealistic food option for many weight watchers due to their high water content and low calorie value. They are an excellent source of Potassium and helps in reducing blood pressure, boosts the immune system, help prevent cancer. Soy Chunks are vegetable protein which contain no fat when compared to animal protein.Also they are rich in fiber, Omega 3 fatty acids, iron and calcium. Nowadays, they are widely added in the preparation of many food items. Though I add Soy Chunks in many of my recipes, the combination of Mushroom and Soy Chunks is unbeatable due to its exclusive aroma. This biryani is a very good option for parties, lunch with a side of a simple raita. Try this out in your kitchen and enjoy.
Ingredients
Basmati Rice - 2 Cups
Red Onion Sliced - 1/2 Cup
Mushrooms Sliced - 2 Cups
Soy Chunks - 1 Cup
Peas - 1 Handful
Salt - To Taste
Oil - 1 tbsp
Melted Ghee - 3 tsp ( For Good Flavour )
Bay Leaves - 3 or 4
Ginger Garlic Paste - 1/2 tbsp
Garam Masala Powder - 1 tsp
Green Chillies shredded - 1
Green chillies slit - 1
Red Chilli Powder - 1 tsp
For Tadka / Tempering :
Cumin Seeds / Jeera - 2 tsp
Cinnamon Sticks - 2-3 Medium
Lavang / Cloves - 5 or 6
Cardamom - 3
Somfu / Fennel Seeds - 1 tsp
Star Anise - A small piece


Method
  • Soak the Basmati Rice in water. Meantime, cut the onion, mushroom and keep them ready.
  • In the cooking pan / vessel, add oil and ghee together. Finish the tempering process by adding the ingredients mentioned as above.
  • Once its done, add the ginger garlic paste on medium flame. Fry them till the raw smell completely takes off.
  • Fry the red onion slices next till they become translucent. Add the green chillies,mushrooms, soy chunks and peas next to the cooking pan and fry them for 4-5 minutes.
  • Add the powders into the pan now and stir them well. Add the sona masoori rice which is completely drained from water into the cooking vessel and fry them for a minute. Add the Bay leaves too into the pan now.
  • Add 3.75 cups of water and required amount of salt into the cooking pan and allow them to cook on a low flame.
  • Once its done, serve this nutritious, protein rich biryani loaded with flavours with a side of cool raita and your favourite side dish.

Saturday 16 September 2017

Coriander Rice \ Kothamalli Sadam - With Onions

Coriander Rice \ Kothamalli Sadam - With Onions


Ingredients:
Sona Masoori Rice - 2 Cups
Fresh Coriander Leaves - 1 Bunch
Tomato - 1 medium Size.
Onion - 1/2 medium size finely chopped
Green chillies - 1 Medium
Garlic - 4 big Ones finely crushed and pasted
Turmeric Powder - 1 tsp
Chilli Powder - 1/2 tsp
Coriander Powder - 1 tsp
Asafoetida - 1 pinch
Peas - 1/4 cup
Salt - To taste
Sugar - 1 small pinch. ( To enhance the taste ).
Olive Oil - 4 tbsp.
Mustard Seeds - 1 tsp
Jeera - 1 tsp
Urad dal - 1/2 tsp

Procedure :
First grind the washed coriander leaves, 1 green chilli, 1 tomato into a fine paste and keep it separately.( I added few pudina leaves too as it was in my fridge for more time.)

On the kadai, add olive oil first. Add mustard seeds, jeera, asafoetida, urad dal one by one. After it starts spluttering, add crushed garlic. Fry properly so that the raw smell of garlic completely goes off. Then, add onion and fry for 2 minutes.
Add the coriander paste from the mixie jar now to the kadai. Mix everything and fry for 2-3 minutes. Then, finally start adding the powders, salt, sugar. Mix everything and add the washed sona masoori rice into the kadai and mix everything together. Transfer it to a big rice cooker if you have. For 2 cups of rice, add 4.5 cups of water. If the coriander paste is too watery, then the coriander rice will be too pasty. So, add water accordingly. Keep it on the stove for 2 whistles. Let it cool down completely.

Open it after it cools down completely. Serve it with raita and little potato chips.

There are so many methods to prepare coriander rice. You can add a powder made out of 1 red chilli, coriander seeds, little coconut, channa dal to the rice finally and cook it with that powder, this in turn will make the rice little more spicy. This method is purely easier and no extra powders are added. In my next recipe, i will write down how to make coriander pulav.

Tips : Dont make the coriander paste too watery. Add water appropriately so that the rice comes out separately and not pasty.

Thursday 14 September 2017

Venn Pongal

Venn Pongal

I can only think of the hot Venn Pongal which I got it on my hand during the Maargazhi Month when we went to sing "tirupaavai/tiruvempaavai" songs in one of our temples in my hometown Thanjavur. It was very hot, tasty even without ghee and cashewnuts. Early in the morning ( before 6 am!!!), we used to go there, sang and got these prasadams. Apart from that,I can only relish and enjoy the pongal which my grandma and mom made for us. My grandma was an expert in this and I remember her making this pongal even at her 86th age.

Ingredients
Rice - 1.5 Cups.
Moong dal / Payatham Paruppu/ Pesara Pappu - 3/4 th of a cup.
Asafoetida - 1 tsp.
Mustard Seeds - 2 tsp.
Jeera - 3 tbsp.
Black Pepper - 2 tsp.
Black Pepper crushed - 1 tbsp.
Curry Leaves - 4 or 5 ( if you have...)
Salt - 1 tbsp.
Ghee - 2 tbsp.
Olive Oil - 2 tbsp.
Cashew Nuts - 2 tbsp.

Method
1. On a thick bottomed pressure pan, add 1 tbsp of ghee first and heat it on a medium flame.
2. Then, add the washed Moong dal / Paruppu into the ghee and fry it till you get a mild aroma.
3. Immediately add the washed rice, 2 tbsp of jeera seeds, asafoetida little and enough salt to the vessel.
4. For 1.5 cup of rice, 3/4 th of a cup of Moong dal, add 5.5 cups of water to the pressure pan.
5. Mix everything thoroughly and let it cook for 4-5 whistles on medium flame.
6. Swtich it off and let it cools down completely.
7. In the meantime, in a small tadka pan, add the remaining 1 tbsp of ghee now.
8. Add 2 tbsp of oil too and heat it. When its heated add mustard seeds, remaining jeera seeds, black pepper seeds, crushed black pepper, curry leaves, cashew nuts slowly into the oil.
9. Saute everything for 1-2 minutes and after they sputter, switch off the stove.
10. Add the grated ginger into the tadka mix.
11. Open the pressure pan and see if the rice-dal mixture is cooked completely.
12. Add the tadka into the pongal and mix everything thoroughly.
13. Now the pongal is ready for Neivedhyam and also for your tiffin. It can be served with a good sides like tomato chutney, Brinjal Kotsu, coconut chutney, Plain Sambar.

Variations
You can add little more ghee in place of oil if you are making it for kids.
I prefer to add enough water to cook in the beginning itself. In that way, pongal is moist and texture of the pongal is not very hard to swallow. It tastes closer to temple pongal i feel.

Wednesday 13 September 2017

Brinjal Rice / Vaangi Bath / Kathrikai Sadham

Brinjal Rice / Vaangi Bath / Kathrikai Sadham

Brinjal Rice / Vaangi Baath is mostly liked by many people and a favourite mixed rice variety in our household. Our family love to have this rice with an excellent egg omelette and raita. There will be many ways to make this Brinjal Rice and each will have its own taste and speciality.
Ingredients
Sona Masoori Rice or Basmati Rice -  1.5 Cup
Brinjals - 6 Medium Size
Onion - 1 Medium Size
Ginger Garlic Paste - 1 tbsp
Turmeric Powder - 2 tsp
Curry leaves ( if you have) - 1 stem
Jeera Seeds - 2 tsp
Mustard Seeds - 2 tsp
Asafoetida / Hing - 1 Dash
Salt - To Taste
For Grinding
Channa Dal / Kadalai Paruppu / Senaga Pappu - 4 tbsp
Coriander Seeds - 2 tbsp
Jeera - 1 tsp
Black Pepper - 1 tsp
Elachi  / Cardamom - 1
Cinnamon Stick  / Pattai - 1 medium size
Dry Red chilly - 2 medium
Khus Khus / Poppy Seeds - 1 tsp
Green Chilly - 1 medium size
Fresh Coconut or Dry Coconut Powder - 2 tbsp
Method
  1. Before starting the process, cook 1.5 cups of basmati rice ( I prefer that ) or Sona Masoori Rice.
  2. Simultaneously, on a thick bottomed kadai, fry all the ingredients for grinding slightly and let it cool for somtime.
  3. Then, wash the brinjals and cut it into small pieces and also the onions.
  4. After the mixture gets cooled, grind the mixture and keep the brinjal mix powder ready. 
  5. On the same kadai, add 2 tbsp of oil . When the oil gets heated, add mustard seeds, jeera, curry leaves, asafoetida into the oil.
  6. When it sputters, add the ginger garlic paste and fry it till it raw smell completely goes off.
  7. Add onions into the kadai, a pinch of salt and fry for 1-2 minutes.
  8. Add turmeric powder into the kadai.
  9. Add the brinjal pieces into the kadai and add little salt and fry it for 2 minutes. Then cover the kadai with a lid and let the brinjals get cooked completely with little water.
  10. Check to see if the brinjals are cooked. If its done, slightly mash the brinjals and add the grounded powder into it.
  11. Fry all the ingredients in the kadai with 2 more tbsp of Olive Oil.
  12. Finally add the cooked rice into the brinjal mixture in the kadai. Mix the rice and brinjal mixture thoroughly. Add 1 more tbsp of salt after adding the rice. Mix it again so that brinjal mixture gets blended into the rice perfectly with salt.
  13. Add more salt if  its required after the mixing is completely over.
  14. Now, the brinjal rice is ready to serve with a raita or an omelette. Its a popular rice variety in many potluck parties.
Variations
You can increase / decrease the black pepper, red chilly powder, green chilly depending on your spicy taste.
Tips
Dont overcook the rice in this process which in turn decides the fate of Brinjal rice.

Tuesday 12 September 2017

Lemon Rice / Elumicham Pazha Sadham / Nimmakai Puliogare

Lemon Rice / Elumicham Pazha Sadham / Nimmakai Puliogare

Lemon has many nourishing elements like Vitamin C,  Vitamin B, phosphorous, proteins and carbohydrates. It helps to stengthen your immunity system ,cleanses your stomach, good for diabetic people, helps constipation problems. Benefits of using lemon is innumerable. So, if someone talks low about lemon rice, explain to them that the "lemon rice, a simple rice dish is an excellent source of all these elements plus good protein and antioxidants ( contributed by ground nuts / peanuts )".

Ingredients
Sona masoori Rice - 1 Cup
Lemon - 1 Big Size or 2 Medium Size lemons
Salt - To Taste
Turmeric Powder - 1 tbsp
Coriander Leaves - To garnish
Grated Ginger - 2 tsp

For Tempering
Olive Oil - 2 tbsp
Gingelly Oil ( Nalla yennai / Til Oil ) - 1 tbsp
Asafoetida / Hing - 1 tsp
Mustard Seeds - 1 tbsp
Jeera - 1 tbsp
Channa Dal ( Kadalai Paruppu / Senaga Pappu ) - 1 tbsp
Urad Dal ( Ulutham Paruppu / Mina Pappu ) - 1 tbsp
Curry Leaves - 1 stem
Ground nuts / Peanuts - 1 full handful
Dry Red Chillies - 2 medium size. 
Green Chillies - 1 big one.

Method
  1. Cook the Sona Masoori Rice first in a pressure cooker or electric cooker separately. Dont cook the rice in pasty form. Let it cool for sometime.
  2. In the kadai, on a medium flame, add the Olive oil first. When its heated, start adding Mustard seeds, jeera first.
  3. When it sputters, add channa dal, urad dal and ground nuts into it. Slowly fry the contents so that they dont turn black or over fried.
  4. Add dry red chillies, curry leaves, asafoetida, green chilly, grated ginger into the kadai. Fry it for a minute.
  5. Switch off the heat. Add turmeric powder into the kadai.
  6. Add the cooked rice into the kadai slowly and mix all the contents with the rice perfectly.
  7. Add the squeezed lemon juice and salt into the rice now. Mix again for few more rounds till the salt and juice spread uniformly.
  8. Add the Sesame Oil to the lemon rice and mix once again.
  9. Garnish with coriander leaves and serve.
Variations
Amount of oil and lemon juice vary depending on your taste.
Also, if you are generous, you can add a handful of Cashewnuts along with peanuts in your lemon rice which makes it rich.
You can also add 1 tbsp of  sesame powder ( white ellu podi ) if you want to reduce the sourness of the lemon in your rice, it tastes very good.

Mint Pulav/ Mint Pulao / Pudhina Pulav/ Pudina Pulav

Mint Pulav/ Mint Pulao / Pudhina Pulav/ Pudina Pulav

Mint Leaves also called as "Pudina" is one of the oldest medicinal herb grown around the world. Its widely used in many range of dishes in Indian Cuisine and its an essential ingredient in many food items. Looking at its medicinal benefits, mint is the best cleanser for the entire body and blood. Crushed mint leaves whiten the teeth and fight against bad breath. Though we regularly stock atleast a bunch of Mint Leaves in the kitchen, we mostly exhaust the bunch by adding them in all of our regular food items.  This time, I exclusively got 2 additional bunches mainly to make my favorite Mint Pulao, which i had forgotten for a while. Nice Aroma was emanating from the Kitchen while making the Mint Pulao, which in turn triggered the tongue to taste it immediately...Definitely an awesome pick for any gathering, parties..
Photo Courtesy by Wiki
Ingredients
Basmati Rice - 3 Cups
Mint Leaves Bunch / Pudina Bunch - 2 Big or 3 Medium
Green Chillies - 5 Big
Oil - 2 tbsp
Melted Butter or Ghee - 3 tsp
Salt - To Taste
Sugar - 1/2 tsp
Red Onion shredded - 1/2 cup
Ginger Garlic Paste - 1 tbsp
Cinnamon Sticks - 2 Big
Lavang/ Cloves - 5 or 6
Marathi Moggu - 1
Bay Leaves - 4 or 5
Cardamom Seeds / Elachi - 4 or 5
Cashew Nuts - 1 Handful
Red Potato / Golden Potato cubes - 1 Cup
Method
  1. Wash the Pudina leaves and make a smooth paste of Pudina and green chillies using a mixer grinder and keep them ready. Soak the Basmati Rice in water while starting the process.
  2. In the big cooking pan ( I used a big non-stick pan), add ghee and oil first. When its heated, add the cinnamon stick, lavang, marathi moggu, cardamom seeds and fry them for a minute.
  3. Add the ginger garlic paste next and fry them till the raw smell goes off. Next add the onions and fry them to golden brown. After that, add the grounded paste of mint leaves and green chillies to the pan and fry them for 2-3 minutes. A nice aroma would start filling the kitchen now...
  4. Finally add the cashew nuts, potato cubes, bay leaves to the contents and fry them again for a minute.
  5. Add 6 cups of water to the cooking pan / vessel, required amount of salt, 1/2 tsp of sugar and mix them well. Allow them to cook on  a low flame directly. When its completely cooked, the cooked mint rice would nicely come up till the rim of the vessel.
  6. Switch off the flame and allow them to settle down for a while.
  7. Serve this with a side of any raita and enjoy...A healthy mixed rice treat with excellent aroma for us.!!!
Tips / Variations
If its for a special party, add little more ghee and make it rich. Instead of cooking directly on the vessel, you can transfer the contents to an electric rice cooker and cook them outside too...

Tomato Pulav / Tomato Rice - Type 1

Tomato Pulav / Tomato Rice - Type 1

Tomato Pulav is one of  the easiest option for a quick lunch. It goes well with a simple onion raita. Though there are different versions of Tomato rice, this is the first version of Tomato Rice I am posting...Will post my different versions I tried earlier in due course. When I talk about this tomato rice, I first get into my hostel days..They used to serve a watery white chutney for the tomato rice. Till today, I am unable to find out what ingredients they would have used for making the chutney.But still I remember the taste of the Tomato rice given in the hostel. Though we used to criticize the hostel food a lot during that time, those good memories and the taste still goes through the mind often and fills the heart happily...
Ingredients
Ripe Tomatoes - 2 Big
Green Chillies - 3 Big
Oil - 2 tbsp
Basmati Rice - 1.5 Cup
Salt - To Taste
Fennel Seeds / Sombu - 1 tsp
Cinnamon Sticks - 2
Lavang / Cloves - 4 or 5
Bay Leaves - 3
Garlic Paste or crushed garlic - 2 tbsp
Turmeric Powder - 1 tsp
Method
  • Cut the tomatoes, green chillies and soak the basmati rice in water. Keep all the ingredients handy.
  • In a big non-stick cooking vessel, add oil first. When its heated, add sombu, pattai/cinnamon sticks, lavang followed by garlic paste, green chillies and fry them well till the rawness completely takes off.
  • Add the tomatoes, turmeric powder into the vessel and leave it for a minute.
  • When its soggy, slightly mash them and add the basmati rice and fry for another minute.
  • Add required amount of salt, bay leaves and 3 cups of water into the vessel.
  • Allow them to cook on a low flame. When the pulav is done completely, switch off the flame.
  • Serve this tomato pulav with a cup of Onion raita / cucumber raita.

Monday 11 September 2017

Simple Veg Pulav - Type 1

Simple Veg Pulav - Type 1


I guess i would have made this veg pulav more than 100 times. This is the most simplest pulav with no grinding but loaded with vegetables, mixed with good spices and basmati rice.The excellent aroma of this veg pulav always invites you to the dining area. I prefer to make this veg pulav especially for parties and get-together. Also, its kid friendly as its not having any spicy gravy or spicy powder in it. Same way, its not too bland too. Its perfect and suitable for all ages. Even with a simple curd raita, its heavenly.  You can make some spicy kurma or any spicy side dish and enjoy with this Veg Pulav.
Ingredients
Basmati Rice - 2 Cups
Salt - To Taste ( But i use 1.5 tbsp approximately)
Olive Oil - 3 tbsp
Ghee or Butter - 1 tbsp ( optional if you are weight conscious)
Carrots - 1/2 Cup cut into small cubes
Beans - 1 Cup cut into small pieces
Potato - 1/2 Cup cut into small cubes
Green Capsicum - 1/2 cup cut into small pieces
Peas - Handful
Onion - 1 Medium One cut into small pieces
Garlic Pods - 4 or 5 peeled
Tomato - 1 Small One
Ginger garlic Paste - 1 full tbsp
Pudina Leaves/Mint Leaves - 3 tbsp cut into small pieces
Green Chillies - 4 or 5 medium ones
For Tempering
Jeera Seeds - 2 tsp
Fennel Seeds / Sombhu - 2 tsp
Cinnamon Sticks / Pattai - 2 medium sized ones
Lavang / Cloves - 5 or 6
Marati Moggu - 1 or 2 small ones
Bay Leaves - 5
Cardamom / Elachi / Elakkai - 3 or 4
Cashew Nuts - 2 tbsp

Method
  1. Take 2 cups of basmati rice, soak it in water for few minutes. Keep it aside.
  2. Wash all the vegetables and cut them into desired shapes as mentioned below. Keep them separately in a big plate.
  3. Wash and cut the pudina / mint leaves and keep it ready.
  4. Cut the onion into small pieces and keep it ready. Peel the skin of 5 garlic pods and keep them ready.
  5. On medium heat, in a thick bottomed vessel, add 1 tbsp of ghee or butter and 3 tbsp of Olive Oil. When it gets heated, add the ingredients for tempering as mentioned above in order and fry them little bit.
  6. Then, add the onions and fry them for a minute. Add the ginger garlic paste and fry them till the raw smell goes off.
  7. Add garlic pods, pudina leaves, tomato, green chillies now to the pulav and fry them for 2-3 minutes.
  8. Then add the cut and washed vegetables and fry them in the kadai for 4-5 minutes. During this time, cook the vessel with a lid for about 2 or 3 minutes so that the veggies get cooked little bit with the steam inside.
  9. Meantime, wash the basmati rice and drain it completely. Add it to the veggie mix in the kadai and fry them for a minute or two till it gets dried and fried a bit.
  10. Then add 3.5 cups of water to the contents in the vessel and add required amount of salt to the mix in the vessel.
  11. Add a tsp of garam masala powder and mix them thoroughly.
  12. Close the vessel with the lid and let the pulav cooks on a low flame. If you are planning to cook the pulav in an electric cooker, transfer the
  13. contents to the electric cooker and start cooking.
  14. After 10-15 minutes, open the lid and check. Your veg pulav would have risen up with the layer of cooked veggies and the aroma of the pulav would be great.
  15. Its ready to serve now with a cool fresh curd onion raita.
Variations
You can add turmeric powder to this veg pulav if you want it more colourful. Somehow i like this veg pulav in white background with colourful veggies.
You can add 1 cup of fresh coconut milk to this Veg Pulav to make it richer and more tastier with 2.5 cups of water.
You can increase the number of green chillies to make it more spicy for you.
Tips
Don't overcook the veg pulav, it makes it more pasty and spoils the texture of the pulav. Cook it only the required amount of water and that depends on the type of basmati rice also.
Try to take out the green chillies after the pulav is done, before serving which makes the kids happy while enjoying this pulav.

Sunday 10 September 2017

Bisibelebath

In Bangalore, we enjoyed this Bisibelebath many times in Darshini. It would be in a semi solid state with lots of veggies in it served with a side of raita. Darshini style bisibelebath was too tastier for me, though it would not have more ghee and sometimes little watery too...This veggie bath would be more suitable on a cold, rainy day with a side of appalams / Pappads. My whole family likes this bisibelebath and so it would be seen in our kitchen more often. I have seen more versions of Bisibelebath since the day I started to prepare. But I stick on to one method which is easier for me..
Ingredients

Vegetables :
Fresh Peas or frozen Peas - 1 Big Handful
Potato - 1 Medium Size 
Beans - 10 or 12
Carrot - 1 medium
Zuccini - 1 Big
Chayote / Chow Chow - 1 Small or 1/2 Big
Onion - 1 Medium
Ripe Tomato - 2

Ingredients for the Bisibelebath Powder
Channa Dal / kadalai Paruppu / Senaga Pappu - 2 tbsp
Urad Dal - 1 tbsp
Coriander Seeds - 1.5 tbsp
Fenugreek Seeds / Vendhayam / Menthilu - 1/2 tsp
Jeera - 1 tsp
Black Pepper - 1 tsp
Cloves / Lavang - 3
Cinnamon / Pattai - 1 Stick medium size
Dry Red Chillies - 5 or 6 Big Ones
Fresh Coconut - 1 tbsp
Khus Khus - 1 tbsp

Other Ingredients
Sona Masoori Rice - 1.5 Cups
Toor Dal - Between 1/2 and 3/4th of a cup
Hing / Asafoetida - 1 Dash
Turmeric Powder - 2 tsp
Salt - To Taste
Jaggery - 1 tbsp
Ghee - 2 tsp
Tamarind Juice - 1/2 thick

Tempering
Olive Oil - 1 tbsp
Mustard Seeds - 2 tsp
Jeera - 1 tsp
Urad Dal / Ulutham Paruppu / Minna Pappu - 1 tsp
Curry Leaves - 1 stick
Dry Red Chillies - 2 

Method
  1. Wash the rice and dal and add it into a  big pressure cooker.
  2. Wash all the vegetables and cut it into desired shapes as you like and add it into the cooker.
  3. Add little Hing / Asafoetida,turmeric powder, 2 tsp of salt into the mixture.
  4. Add 6 cups of water into the cooker and cook the contents in the cooker for 4 whistles. Switch off the heat.
  5. Meantime, fry the ingredients for the Bisibelebath powder to golden brown ( Not too brownish or black ) and grind them in a mixer grinder to a fine powder.
  6. On a thick bottomed pan, add 1 tbsp of Olive Oil . When its heated, add Hing, Mustard seeds, Urad Dal, Jeera, Curry Leaves, Dry Red Chillies into it in order for tempering. When it sputters, add the grounded powder too into the pan, fry it for a minute and add the extracted tamarind juice and jaggery into it. Fry all of them for a minute.
  7. Then, pour them over the Bisibelebath in the pressure cooker. Add required amount of salt to the Bisibelebath and mix everything in the pressure cooker nicely.
  8. On a very low flame, add some more water to the Bisibelebath and allow it to be on heat for 3-4 minutes for the powder to get completely mixed and cooked with the bath.
  9. Switch it off and add ghee on top of the Bisibelebath and serve this with raita and hot urad dal appalams/ Papads.
Variations
  • You can add the onions, tomatoes into the tempering pan itself and fry them along with the grounded powder and then add them to the bisibelebath.
  • You can add half green capsicum along with onions, tomatoes into the tempering pan. It adds more taste to the Bisibelebath definitely. As I don't have that vegetable now, I could not add it.
  • You can add any type of vegetables like Brinjal, Drumstick, white pumpkin,etc., into the Bisibelebath. I have added the vegetables that I have at home.
  • You can add groundnuts along with the vegetables into the Bisibelebath before cooking.
  • You can decorate the bath with fried groundnuts, cashewnuts or boondi on top before serving.
Tips
  • Don't cook the bisibelebath in the cooker into a fine, smooth paste. Because, after you add the powders, water at the end, the final cooking process will make it more pasty and you wont be able to see any rice separately.
  • If you have small onions, try to make this Bisibelebath with the small onions. The Taste of the bisibelebath definitely gets upgraded with small onions, green capsicum, drumsticks and good bisibelebath powder.
Notes
In this process, I added all the vegetables at one shot into the cooker as I made it for the kids. If you are making the Bisibelebath for a Potluck / Party,  add small onions, tomatoes, green capsicum into the tempering pan. When they get mashed and fried, add the grounded powder , tamarind extract, jaggery and then fry and pour them over the Bisibelebath.

Saturday 9 September 2017

Veg Fried Rice-Restaurant Style-Type 2

For the potluck we had on last weekend, I made a different vegetable fried rice, not in a typical south indian style. This try is mainly due to the fried rice I tasted in Delhi couple of years ago..It would be in a mild yellow colour with small veggie pieces, little nuts and flavoured with some special spice powder. Having that in mind, I started making this type of veg fried rice since few years.  This type of fried rice would go well with any north indian dishes like Dal Tadka, Dal Makhani, paneer dishes and other vegetable dishes.
Ingredients
Basmati Rice - 3 Cups
Beans - 1 Cup cut into tiny squares
Carrot - 3/4  Cup cut into tiny squares
Potato - 1 Cup cut into tiny squares
Fresh Peas or Frozen Peas - 3/4 Cup
Green Capsicum - 1/2 cut into thin pieces
Onion - 1 Medium cut into small pieces
Cashew Nuts - 1 Handful
Jeera - 2 tsp
Cinnamon Sticks / Pattai - 2 Medium
Lavang / Cloves - 3 or 4
Bay Leaves - 5 or 6
Marathi Moggu - 1
Elachi / Cardamom - 2
Pudina Leaves - 1 Handful
Olive Oil - 2 tbsp
Ghee or clarified butter - 1 tbsp
Salt - To Taste
Turmeric Powder - 2 tsp
Ginger Garlic Paste - 1 tbsp
Green Chillies - 4 Big slit into halves
For the Powder
Cinnamon Stick / Pattai - 2
Cloves / Lavang - 5 or 6
Jeera - 1 tsp
Black Pepper - 1 tsp
Elachi - 1
Cashew Nuts - 1 tbsp
Marathi Moggu - 1
Pista - 1/2 tbsp
Method
  1. Wash and cut the vegetables into desired shapes and keep it aside.
  2. Roast the ingredients slightly for the powder and grind them in a mixer grinder and keep it ready.
  3. Wash and soak the basmati rice in a separate vessel. Now start the process of making...
  4. On a medium heat, keep a thick bottomed cooker or a thick bottomed nonstick vessel on the stove.
  5. Add 2 tbsp of Olive Oil and 1 tbsp of clarified butter into it. When its heated, add jeera, cinnamon sticks, cloves, Cardamom, Marati Moggu, Bay Leaves into it and fry them for few seconds.
  6. Add the onions and fry them for a minute with a small pinch of salt.
  7. Add the ginger garlic paste now and fry till the raw smell goes off completely.
  8. Add green capsicum, pudina leaves,green chillies in order and fry them again for a minute.
  9. Add all the cut veggies, turmeric powder, cashew nuts, little salt and fry them for a minute. Now close the lid and let the contents in the pan cook for about 3-4 minutes on a low flame.
  10. Veggies would get cooked with the steam formed inside..Open the lid and add the grounded powder now and fry all the contents in the vessel or pan for few minutes.
  11. Now drain the water from Basmati Rice and add the rice into the cooking vessel directly.
  12. Fry them again for few seconds till the basmati rice becomes little dry and get fried a bit.
  13. Now add water ( about 5 Cups ) ans required amount of salt to the vessel and close the lid. Let the vegetable fried rice cooks completely on a low flame for about 10-12 minutes.
  14. If you are making this rice in an electric cooker, transfer the contents from the pan into the cooker and then add water.
  15. Generally I prepare this veg fried rice directly in a Non stick flat bottomed vessel which makes my process easier.
  16. After 10-12 minutes, the veg fried rice would have risen upto the edge of the vessel nicely. Carefully mix the fried rice upside down without breaking the basmati rice and close it.
  17. Now the vegetable fried rice would be in a mild yellow colour with a nice aroma of Indian spices. Serve this with any good side dish and a raita.
Variations
Amount of water depends on the quality of the Basmati rice. So, add water accordingly.
You can add slightly fried cashew nuts, pista, badam into pieces on the top of the fried rice at the end instead of adding the cashew nuts in the beginning.
Tips
Take out the green chilli slits after the veg fried rice is completely done. Its very helpful especially when you are serving this in parties.
No need to add more spices during the tempering process as you would be adding the grounded spice powder too.

Friday 8 September 2017

Vegetable Pulao - Type 2

I made a different style of vegetable pulao yesterday. This version requires a grounded paste of  Khus Khus, fresh coconut and little cashew nuts. Though I am not a big fan of using high calorie gravy or paste in my cooking, I made this pulao richer as I made it for my kids.  With limited vegetables, grounded paste and some indian spices, the vegetable pulao came out richer, tastier and flavourful. Just a simple onion raita is enough to finish the plate. May be...we can have few potato chips on its side. ( if you are lucky to have those!!!).
Ingredients
Carrots - 1 Medium
Potato - 1 medium
Fresh Peas - 1 Handful
Green Capsicum - 1\2 cup finely cut
Tomato - 1 Medium
Onion - 1 Small
Mint Leaves \ Pudina Leaves - 1 Handful shredded
Green Chillies - 2 Big Ones
Olive Oil - 2 tbsp
Jeera - 1 tsp
Kala Jeera - 1 tsp
Lavang \ Cloves - 5 or 6
Cinnamon Sticks \ Pattai - 3 Medium
Marathi Moggu - 1
Cardamom \ Elachi - 3 
Bay leaves - 3
Ginger Garlic Paste - 1 tbsp
Basmati Rice - 1.5 Cups
Turmeric Powder - 2 tsp
Dry Red chilli powder - 1\2 tsp
Garam masala Powder - 1\2 tsp
Salt - To Taste
Coriander Leaves - To Garnish

For Grinding
Fresh Coconut - 1\4 Cup
Khas Khas - 1 tbsp
Cashew Nuts - 2 tbsp

Method
  1. Wash and cut the vegetables into small cubes and keep it ready. Cut the onion, tomato and slit the green chillies in the middle and keep it ready too.
  2. Wash and finely cut the mint leaves and keep it aside.
  3. Prepare the paste by adding all the ingredients in a mixer grinder with some water.. Make a rich, smoothy paste and keep it ready too.
  4. Soak the basmati rice in water for few minutes.
  5. On a thick non stick kadai \ vessel, add olive oil first. When its heated, add jeera, kala jeera, lavang \ cloves, cinnamon sticks \pattai, elachi, marathi moggu, bay leaves in order and fry them for a minute.
  6. Add the finely cut onion, green chillies, ginger garlic paste into the kadai and fry them nicely till the raw smell goes off completely from the kadai.
  7. Next add the green capsicum pieces, pudina\mint leaves and fry them well with a pinch of salt.
  8. Add the chopped tomato into the kadai and fry them well till it becomes mashy.
  9. Add all the finely cut vegetables into the kadai and fry them in the kadai for 2 minutes.
  10. Add the turmeric powder, dry red chilli powder, garam masala powder, a pinch of sugar and mix everything in the kadai thoroughly so that the vegetables get coated with the powders nicely.
  11. Now add the grounded paste into the kadai and fry the contents well for 2 minutes.
  12. Add the drained basmati rice into the kadai and fry them well for a minute.
  13. Now add water ( about 2.5 cups of water for 1.5 cups of Adora basmati rice ) to the kadai directly and add required amount of salt to the contents and mix them well.
  14. On a low heat, allow the contents in the kadai to cook for nearly 15 - 20 minutes. After 15-20 minutes, the vegetable pulao would have risen till the edge of the kadai with a wonderful flavour.
  15. Open the lid and carefully turn the pulao upside down and close the lid again. Allow them to stand on low heat for another 2 minutes.
  16. Then, switch off the heat if the vegetable pulao is completely cooked to your satisfaction.
  17. Garnish with coriander leaves and serve with a side of onion raita and Potato chips.!!
Variations
You can cook the basmati rice separately and add the rice slowly to the cooked vegetable spicy mix and complete the vegetable pulao. In this way,  the basmati rice does not break and the look of the pulao is great. I generally stick on to this method if I make this pulao for more people.
You can add more vegetables of your choice in this vegetable Pulao.

Tips
Before starting the actual cooking process, keep all the required ingredients ready on its side. This will definitely fasten the process of cooking.
Amount of water required for cooking the pulao may differ with different basmati rice varieties. So, add water accordingly.

Tomato Puliogare / Thakkali Puliodharai / Tomato Puliodarai

Tomato Puliogare / Thakkali Puliodharai / Tomato Puliodarai

 Puliodarai / Puliogare is an authentic south indian rice variety which is generally made during festivals or on special occasions. Puliodarai is mostly liked by all and we love to taste this tangy rice during odd days also. As we all know that puliogare is generally made with thick tamarind paste along with other ingredients, I wish to try making "Tomato Puliogare" by adopting the method of making Puliogare with thickened tomato gravy instead of  tamarind gravy/paste. And I named my yummy, tangy Puliodarai as "Tomato Puliodarai". If you have "sour" tomatoes, then the taste would be heavenly. With an addition of few drops of Gingelly oil, the flavour of Puliodarai would be upgraded. With good accompaniments like Appalam, Vadams, or just with Potato chips, we can enjoy the Tomato Puliodarai at any time of the day. A good lunch box recipe, of course...
Ingredients
Tomato - 10 to 12 Medium size
Salt - To Taste
Gingelly Oil - 3 tbsp
Oil - 1 tbsp
Basmati Rice / Sona Masoori Rice - 2.5 Cups
Hing/Asafoetida - 1 Dash
Mustard Seeds - 1 tbsp
Cumin Seeds - 1 tsp
Dry Red Chillies - 5
Urad Dal /Minna Pappu/Ulutham Paruppu -  1 tbsp
Channa Dal/Senaga Pappu/Kadalai Paruppu - 1 tbsp
Ground nuts / Peanuts - 2 handful ( Adjust according to your taste )
Curry Leaves - 2 stems
Jaggery - 1 tsp
For the powder
Channa Dal / Senaga Pappu / Kadalai Paruppu - 1.5 tbsp
Urad Dal / Ulutham Paruppu / Minapa Pappu - 1 tbsp
Vendhayam / Fenugreek seeds / Methi Seeds - 1 tsp
Coriander Seeds - 3 tsp
Dry Red chillies - 5 or 6 big
Method
  1. Wash the tomatoes and chop them ready. In the frying pan, add a tsp of oil and fry all the ingredients for making the spice powder till a nice aroma emanates. Then, grind them nicely using a mixer grinder and keep the spice powder ready.
  2. Cook the Basmati Rice / Sona Masoori Rice and keep it ready. For 1 cup of basmati rice add 2 cups of water. For 1 cup of Sona Masoori rice, add 2.5 cups of water. But this ratio totally depends on the type and age of the rice.
  3. In a separate frying pan, add a tbsp of oil and when its heated, add the chopped tomatoes and a pinch of salt and fry them till they become mashy. Make a thick paste of this tomato gravy and keep it ready.
  4. In a big frying pan, add the remaining oil and start adding the ingredients for the tempering process like Hing, Mustard seeds, Urad Dal, Channa Dal, Ground nuts, Dry red chillies, curry leaves. Roast them till they turn golden brown.
  5. Then, add the thicken tomato paste and the spice powder to the pan. Mix them well and fry them for about 2-3 minutes till they all blend together.
  6. Add the cooked rice to the pan and spread them using a spatula. Add the Gingelly Oil, required amount of salt to the rice and mix them well with the spicy paste.
  7. Leave the rice in the pan as it is for couple of minutes and transfer the rice to the serving container.
  8. Tomato Puliodarai is now ready to enjoy with a side of few papads and crunchy vadas.
Tips / Variations 
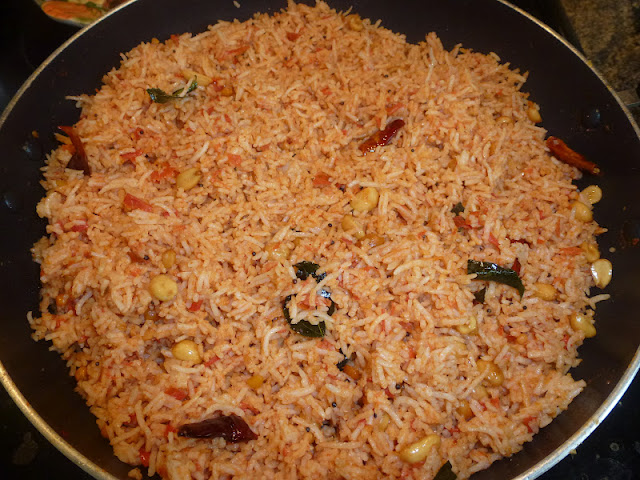
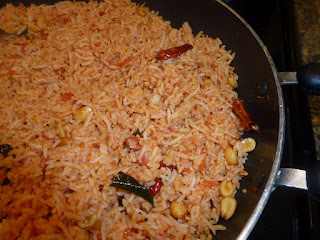
  • Instead of directly adding the chopped tomatoes, you can add the crushed tomato puree into the frying pan while making the thick tomato paste.
  • You can add cashew nuts too while making this Puliodarai for a special occasion.
  • Try not to forget the Gingelly Oil as its the main taste maker in Puliodarai.
  • Cook the rice to the right consistency so that its not sticky or pasty. Rice should look separate but cooked.