search the web

Showing posts with label Sweet Varieties. Show all posts

Tuesday 3 October 2017

Plantains Sauteed in Butter/Ghee..

The dog days of summer.. long hot days, humid days, a handful of thundershowers.. well.. any day a better summer than last year's wet, unseasonably cold summer.
Someone left a comment saying, " its summer outside my window" and I just realized my bog is still showing fall!!! Well, long hours of work and managing the house doesn't leave time for blogging anymore but I had to change the fall picture!!
Now its Ramzan season and all thoughts of food are centered around the traditional for me at least. 
Ramzan's fast  is a loooong day here this time and barely any time left to do the  2-3 courses of food after breaking fast. Guess we have to wait a long time before wee get winter fasts here!

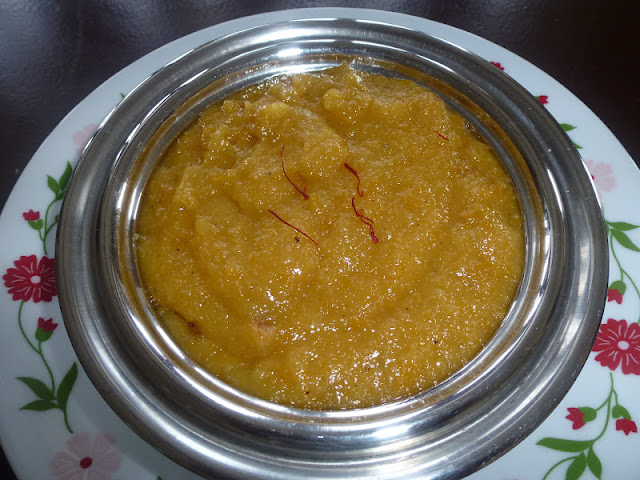
Ramzan, Iftars..and Plantains..go hand in hand for me..
How many ways can you eat the humble plantains? Ask a Keralite/Mallu..
Pazham Narachathu/Plantains stuffed with coconut and sugar, or scrambled sweet egg.
Pazham Porichathu/ Plantains dipped in batter and fried.
Pazham Vattiyathu/ Plantains cut and sauteed in ghee.
Pazham Ulathiyathu/ Scrambled Plantains with coconut and sugar.
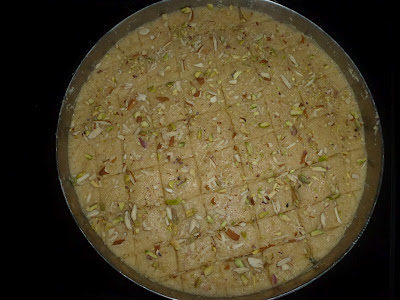
Unnakayi/ Mashed Plantains stuffed with coconut.

This one above is the simplest way to satisfy a dessert craving.. Slice Plantains into slices horizontally or vertically. Heat 2 tsp of Butter/Ghee and saute the plantains for 2-3 minutes on each side on medium heat. When they look golden halfway through the thickness, flip them and cook the other side. Sprinkle sugar and let it melt and as it starts crusting, remove and serve. Traditionally , the sugar is sprinkled after the plantains are removed onto a plate, but the slightly crusted sugar also tastes yum.
Try it on its own.. or in the Americano way.. with vanilla ice cream..:)
Don't ask if you can saute this in olive oil or vegetable oil to make it healthy...its not really meant to be.. it's meant to be enjoyed in moderation.

Sunday 17 September 2017

Chocolate Kalakand / Chocolate Milk Cake - Using Ricotta Cheese

Chocolate Kalakand / Chocolate Milk Cake - Using Ricotta Cheese


I made this special "Chocolate Kalakand" for our sweet Krishna in our house, my son. My kids were so excited to see the Chocolate version of kalakand and they enjoyed this sweet happily. Preparation of this Kalakand was exactly the same as the regular Kalakand except that I added a packet of Cocoa to the mixture before microwaving them.

Kalakand / Milk Cake - Using Ricotta Cheese

Kalakand / Milk Cake - Using Ricotta Cheese


I made this milk based sweet Kalakand during the festival "Krishna Jeyanthi".  Using Ricotta cheese, the process was made simpler and quicker.  I adopted the microwave method for making this sweet as it reduces the preparation time.
Ingredients
Part Skim Ricotta Cheese - 3 Cups
Milk Powder - 1.5 Cups ( I used Fat Free Milk Powder )
Sugar - 1.5 Cups
Melted Butter - Between 3/4 to 1 Cup
Rose Essence - 2 Drops ( For Good flavour but its optional ).
Shredded Nuts - 1/2 cup ( To decorate the kalakand on its top ).
Cardamom Powder - 1 tsp
( Shredded Nuts include Cashew nuts, Almonds, Pistachios.)
Method
Mix all the ingredients in a microwaveable glass bowl except the cardamom powder, rose essence and shredded nuts. Cook them in a microwave for nearly 10-15 minutes till the contents get little thicker and comes to a semi solid consistency. Add the cardamom powder, rose essence at the end of the process and mix them well. Pour them over a ghee coated plate uniformly. Before the Kalakand mixture gets cold, make squares or any shapes you desire. Once it gets completely cold, take out the kalakand squares and enjoy. While cooking them in a microwave, take out and stir them constantly and continue the process.
 
Tips / Variations
You can adjust the amount of sugar and ghee according to your taste.
Kalakand texture would be little softer if the amount of ghee is less. So, adjust the ghee level according to the texture you want.

Shrikand / Kesar Pista Shrikand / Healthy Shrikand - Using Greek Yogurt

Shrikand / Kesar Pista Shrikand / Healthy Shrikand - Using Greek Yogurt


Sweets / Desserts always make our soul happy and if its a healthy sweet, then a guilt free enjoyment would take us to heaven.  Shrikand sweet was first introduced to me by my husband and I started enjoying it very much. Instead of  our regular  curd / Yogurt, I substituted Greek Yogurt in my preparation ( as it has more protein value ) and its absolutely delicious. Amount of sugar is also very less..Above all, its a quick dessert which can be made at any time and enjoy with. 
Ingredients
Green Yogurt - 6  ( 20 oz pack - 2 .I used )
Cardamom Powder - 1 tbsp
Saffron soaked in warm water - 2 pinch.
Nutmeg Powder - 1 tsp
Honey - 3 tbsp
Crushed Pista - 1 cup
Sugar - 3/4 cup to 1 cup ( Add more if you like )
 Method
  • In a big mixing bowl, add all the ingredients one by one and blend them well. 
  • Transfer them into small serving bowls and chill them in refrigerator for few hours.
  • Enjoy this cool healthy dessert after a meal. 
Tips / Variations

Add more sugar to the Shrikand if you like more sweetness.


Thursday 14 September 2017

Kesar Pongal

Kesar Pongal

Kesar Pongal is a pongal with good flavour, colour and taste. It reminds me of the pongal which was served in one of the perumal temples in NY state.
Ingredients
Rice - 1 Cup
Moong Dhal / Payatham Paruppu / Pesara Pappu - 3/4th of a cup
Kesar food Powder - 1 pinch ( If you have saffron, add 1 tsp of saffron)
Sugar- 3/4 th of a cup.
Elachi powder - 1 tsp
Crushed Pista Powder - 1 tbsp.
Pacha Karpooram / Borneo camphor in english - 1 pinch.
Ghee - 2 tbsp.
Cashew Nuts - 1 tbsp.
Method
1. Wash the dal and rice and cook in a pressure cooker for 3-4 whistles. Add 5 cups of water and cook it on a medium flame. Add a pinch of kesar food powder or 1 tsp of saffron to the mix before cooking.
2. After it cools down completely, open and mix it thoroughly.
3. Add powdered sugar, elachi powder, crushed pista powder,pacha karpooram at this point. Stir continously so that no lumps are formed, it does not get stick to the bottom.
4. Cook everything on a low flame at this point.
5. Add ghee and roasted cashew nuts to the pongal now.
6. Mix again and the kesar pongal is now read for neivedhyam.
7. Before serving, just pour little ghee on top of the kesar pongal.

Variations
I prefer not to add milk in this pongal, as it already has heavy dal in it.
You can add milk in your process if you like it that way.

Also, amount of ghee and sugar can vary based on your sweet tooth.

Ashoka Halwa

Today I am going to write about "Ashoka Halwa". Its the first food i made in my lifetime!!! ( Not even coffee or tea and I made it in 9th std with my friend after bunking school for half a day). A small hot packet of Ashoka Halwa which my mom used to bring for us from tiruvaiyuru really took my heart. It became my most favourite sweet since childhood. Tiruvaiyaru ashoka halwa is known for its unique taste and nothing can beat the originality of it. You would have come across this sweet if you have attended any marriages around thanjavur district.
Here comes my version of Ashoka Halwa to you.

Ingredients
Moong Dhal ( Payatham Paruppu / Pesara Pappu) - 1 Cup
Wheat Flour - 1/4 cup.
Sugar - 1 Cup ( More or less depending on your taste).
Elachi Powder - 2 tsp.
Kesar food colour - 1/2 tsp.
Ghee - 1/2 cup. ( For low calorie, add only 1/4 cup).
Milk - 1/2 cup.
Method
  1. Cook the Moong dhal ( Payatham Paruppu / Pesara pappu) with milk and water in a pressure cooker for 4-5 whistles till it becomes tender and softer.
  2. Slightly fry the whole wheat flour on a kadai with very little ghee and keep it aside.
  3. Open the cooker now and mash the dhal perfectly without any lumps. Add powdered sugar and food colour to the dhal, stir it continously.
  4. Slowly add spoons of ghee on the sides while stirring.
  5. After it melts, add the elachi powder for good flavour.
  6. Also, add the light fried wheat flour into the kadai and stir everything continously.
  7. Keep adding spoons of ghee in the middle and stir the mixture till it comes to a thicker consistency like a halwa.
  8. Add the remaining ghee and decorate it with cashew nuts. Let it cool for sometime and then taste it.
Variations
Generally i add milk while cooking moong dhal, you can avoid it if you dont like the taste of it. Amounts of sugar and ghee can vary depending upon your taste, weight, calorie counts. 
Tips
Switch off the heat when the halwa mixture is almost nearing the halwa consistency. Dont stir the halwa mix till it becomes hard. When it gets cooled, automatically it gets little thicker. If you have a good quality dal / Paruppu, it tastes very good.

Ragi Puttu - Healthy Breakfast Option

Ragi Puttu - Healthy Breakfast Option


On "Thai Poosam" day morning, I wanted to make some good healthy Prasadam and offer to Lord Muruga. ( so that we can also enjoy without guilt!!!) Ragi puttu flashed in my mind and as usual I was trying to get away from that idea due to my fear of ruining the puttu. My mom made a delicious Ragi Puttu last summer when we visited. Having that in mind, I did not even try to attempt before. But on "Thai Poosam", I decided to try my level best. I followed the detailed instructions of my mom and attempted at last and it was indeed a great success for me.!!  The method is not that complicated as I thought. Its a healthy breakfast for all ages and for kids, with few drops of hot melted ghee, its heavenly...My Dear bloggers, try this out and make a new addition in your Breakfast list.
Ingredients
Raagi Flour -  3 cups
Fresh Coconut flakes - 1 cup
Powdered Sugar - 1 cup
Melted Ghee - 2 tbsp
Cardamom Powder - 3 tsp
Cashew Nuts - 1 Handful roasted in ghee
Salt - 2 pinch
Water - Enough to make the Puttu Dough.
Method

Take 3 cups of Raagi Flour in a bowl and add few teaspoons of water gradually and make the Puttu Maavu / Dough. The consistency of the Puttu Maavu should not be too thick or watery. If you make a ball out of the Maavu in your hand, you should be able to do it and if you slightly press the ball, it should break totally. As this is an important step, care should be taken while adding the water. Rest of the process is very simple.

After you make the Maavu satisfactorily, place it on a thin clean cloth and steam cook the Raagi Maavu for nearly 8-10 minutes. Open the steamed Puttu Maavu and spread it on a clean dry bowl. Break down all the lumps and make it powdery.

Let it cools down for 2-3 minutes. Then add elachi/cardamom powder, ghee, powdered sugar, ghee roasted cashew nuts and mix them well. Finally add the fresh coconut flakes after it cools down considerably and mix them well again. Healthy Raagi Puttu is ready with an excellent flavour and delicious taste and ready for Neivedhyam.
Tips / Variations
While making the Puttu Maavu, instead of adding water at one shot, add teaspoons of water slowly and make the Puttu maavu.
Try to add the coconut flakes at the end. Before adding the coconut flakes, check to see whether they are fresh. Otherwise, the entire Puttu would be spoiled.
In addition to roasted cashew nuts, you can even add finely shredded almonds, pistachios in the puttu to make it more richer.

Sunday 10 September 2017

Blueberry Kesari

Blueberry Kesari

In the Krishna Temple, I first tasted this purple colour kesari and got attracted with the colour, flavour and taste of that Kesari. Since then, I have been thinking to make this kesari in my kitchen. Maha Shivarathri was the best choice to try out this Prasadam as I somehow feel some closeness between Lord Shiva and Blueberry, may be due to the colour.!! My version also turned out good with the exact blueberry flavour, taste and colour..So, I have decided to make this Prasadam mainly for Lord Shiva and Lord Krishna for the reason I mentioned.
 
Ingredients
Blueberries - 1/2 cup
Rava / Sooji - 1/2 cup
Sugar - Between 1/4 and 1/2 cup
Ghee - 1 tbsp
Cardamom Powder / Elachi / Elakkai - 1 tsp
Ghee roasted cashew nuts - 8 or 10 small pieces
Method
  • In a cooking pan / frying pan, first roast the Sooji / rava with a drop of ghee till it turns golden brown.
  • Then add 2 cups of water and stir them well. When the sooji is cooked well, add sugar and blueberries into the pan. Stir constantly till the blueberries get cooked and mashed thoroughly.
  • Slowly the Kesari would be turning into light purple colour when the blueberries are getting mashed.
  • Next add the Cardamom powder and ghee and stir them well on a medium flame.
  • Switch off the flame when you notice the kesari coming out of its side easily and the ghee oozing out of the Kesari.
  • Drop few ghee roasted cashew nuts on its top and offer the prasadam to Lord Shiva.

Friday 8 September 2017

Pal Kova / Theratti Pal / Thiratti Pal - Using Ricotta Cheese

Pal Kova / Theratti Pal / Thiratti Pal - Using Ricotta Cheese

Pal Kova, also called as Theratti Pal in Tamil is a creamy milk sweet made with thick milk, jaggery or sugar and some melted butter or ghee. Out of all Pal Kova I tasted, Aavin Palkova stands the best. Its always tricky for me to understand how they arrive at the unique taste of  Aavin Palkova and howmuchever I try, my version would not taste the same. But this time, I used my brain so much to come closer to that version. I made this specially for one of my friend Preetha's Seemandham / Baby Shower. I used the combination of both sugar and jaggery while making this Pal Kova so as to get the brownish colour. Process is much simpler as I used only microwave for my entire cooking. This basic idea was originally given by my friend Soundarya couple of years back..I customized little bit and tried her method and the final result was awesome.
Ingredients
Ricotta Cheese - 32 Oz ( Used Part Skim 32 Oz / 2 lb ) or 5 Cup
Fat Free Milk Powder - 2 packets / 3 Cup
Condensed Milk Can - 1
Powdered Jaggery - 1 Cup
1% Milk - 1 Cup
Melted Ghee - 1 Oz Bar / 3/4th of a cup
Cardamom Powder / Elachi Powder - 2 tsp
Roasted Cashew nuts - 1 Handful to decorate.
Method
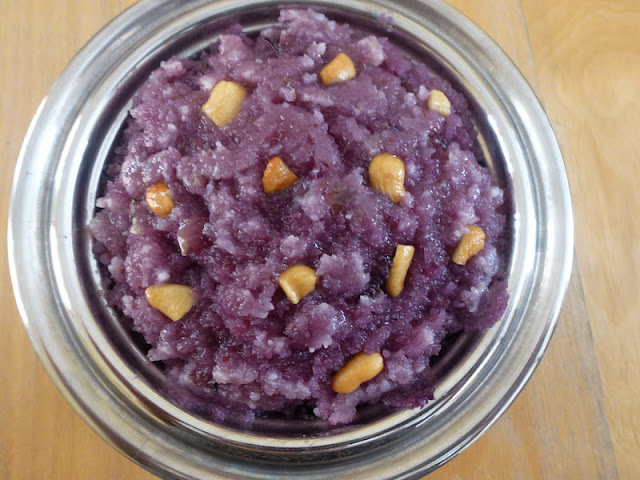
  • In a big deep glass vessel or any deep microwave vessel, add all the ingredients except cardamom powder and cashew nuts and mix them thoroughly.
  • Cook them on high in microwave for about 5-6 minutes. Open the microwave and stir them on all sides.
  • Continue the process for another 3 to 4 times. Every time stir the PalKova and you would notice the Kova changing to light brownish colour and getting closer to a thick consistency.
  • When the Kova comes to the actual semi solid state, add the cardamom powder and mix well.
  • Microwave for another 1-2 minutes and decorate with roasted cashews.
Tips / Variations
  • Instead of Sweet Condensed Milk you can add sugar directly.
  • Instead of fat free versions, you can very well make it with whole milk Ricotta Cheese and milk powder to achieve a more richer taste.
  • Don't microwave till the kova gets completely dry. In order to obtain the right kova taste, try to retain some moisture in the Pal Kova.

Wednesday 6 September 2017

Beetroot Halwa

Beetroot Halwa

Made this halwa due to my daughter's request. She has been an ardent fan of beetroot halwa since her childhood. Instead of grating the beetroot for the halwa which I regularly do, I steam cooked the beetroot and grinded it. This process was super quick and the halwa consistency was achieved faster than expected. As Beetroot is very healthy vegetable, this sweet item is very sutiable for kids.
Ingredients
Beetroot - 2 Big ( 4 Cup )
Sugar - Between 1 Cup and 2 cups
Cardamom Powder / Elachi Powder - 3 tsp
Cashewnuts - 1 Handful
Melted Butter / Ghee - 3 tbsp
Rose Essence - 2 Drops
Method
Peel the skin and steam cook the beetroot using a pressure cooker. Grind the beetroot using a mixer grinder and transfer it into a thick bottomed pan/ kadai. Add the sugar, cardamom powder and a drop of rose essence and stir them well.  When the consistency of the Halwa is perfect, then add the ghee to the halwa and stir them for few more minutes. After the halwa is done, transfer the halwa into a serving bowl. Decorate the halwa with ghee roasted cashew nuts on its top just before serving..
Tips/Variations
Grate the beetroot using a grater and cook them directly in the kadai/pan and try..

Tuesday 5 September 2017

Broken Wheat Rava Kesari \ Godhuma Rava Kesari


Rava Kesari is the most common sweet as we all know. I just wanted to try out the same with the broken wheat rava. Its almost similar to the Sathyanarayana Swami pooja Prasadam. I followed the same method of preparing Kesari except that I cooked the broken wheat initially before mixing it with the Sugar Syrup. As broken wheat is highly nutritious, this Kesari is definitely a very healthy sweet for everyone. Though it takes little extra time than the normal Kesari, its worth for its benefits.
Ingredients
Broken wheat / Dalia - 1 Cup
Sugar - 1 Cup
Kesari Powder / Food Colour Powder - 1 pinch
Elachi / Cardamom Seeds / Elakai - 4 or 5
Pista Seeds - 5 or 6 crushed.
Dry Grapes / Raisins - 1 tbsp
Cashew Nuts - 2 tbsp
Ghee - 3 tbsp
Method
  • Roast the Broken Wheat Rava with little ghee for couple of minutes and cook it with some water.
  • Mean time, in a thick vessel, make a sugar syrup by adding Sugar and little water. Add the Kesar food colour, cardamom powder into the Syrup. Keep it ready.
  • When the Broken wheat is fully cooked, then slowly add the Sugar Syrup into the kadai. Keep stirring the Kesari constantly in order to avoid any lumps.
  • Add the crushed pista powder and 1 tbsp of ghee into the Kesari. Mix them well.
  • Do the cooking on a medium flame. Roast the Cashew nuts and raisins with little bit of ghee and add them into the Kesari.
  • Add the remaining ghee into the Kesari and mix it upside down uniformly.
  • Now the Kesari is ready for Neivadhyam.
Tips / Variations
You can add more sugar and ghee according to your taste. If its for a party or festival, you can generously add more ghee to the Kesari to make it richer. If you have some saffron at home, you can add 1/2 tsp of Saffron flowers into the Kesari. This would give us a nice aroma and the taste of the Kesari would be unique.

Monday 4 September 2017

Godhumai Vazhaipazha Appam / Wheat Banana Appam


Wheat Appams, Godhumai Appams are easier to make during festival days. My mom used to make these Godhumai Appams on Saraswathi Puja day. I added a big ripe banana into the appam batter and made it. Appams tasted almost like a banana walnut muffins..
Ingredients
Wheat Flour - 1.5 Cups
Rice Flour - 2 tbsp
Jaggery Syrup - 1 Cup
Elachi / Cardamom Powder - 2 tsp
Bananas - 1 big ripe banana mashed
Oil - Enough to fry the Appams
Method
  1. Make a Jaggery Sryup with 1 Cup of Jaggery in a separate vessel. The Syrup should be little thick and should drop down but not too watery.
  2. Meantime, in a vessel add all the ingredients for making the Appam Batter and keep it ready.
  3. After the Jaggery syrup is done and cools down little bit, pour them slowly over the appam batter and mix it thoroughly without any lumps.
  4. In the frying pan, add some oil and heat it. When the oil gets heated up, drop small rounds of appam batter into the oil carefully.
  5. Flip them on both sides and fry them till they become golden brown in colour. Drain them all in a flat vessel with a paper tissue on it to soak the extra oil from the appams.
  6. Likewise, continue the same for the rest of the batter. Mostly these appams wont drink that much oil. Arrange all the appams on a plate after they are drained completely and its ready for Neivedhyam.
Tips
Consistency of the appam batter is very important here. If the batter is little loose and thin, it drinks lot of oil. Try to make the appam batter mostly with the Jaggery Syrup itself. Still if the batter is too thick, you can add some water into it and make the batter like the Idly batter.
Variations
You can add crushed nuts like almonds, cashew nuts, pistas into the batter.
You can add few fresh coconut flakes into the batter too and try them out.

Puran Poli / Bobbatlu / Poli / Bobbattu / Healthy Bobbattu

Puran Poli / Bobbatlu / Poli / Bobbattu / Healthy Bobbattu


Its all always difficult to control the tongue especially during the festival days. But at least, if we try to make it little more healthier with less oil, we can have one without guilt. We try to make the Poornam Poli / Bobbattu with whole wheat flour only in our house. For Ugadi, I made Poornam Bobbatlu using wheat flour and enjoyed.

Ingredients

For the Dough

Whole Wheat Flour - 4 Cups
Maida - 1 Cup ( For easy spreading )
Salt - To Taste
Oil - 1 tbsp ( for making the dough )
Water - As required for making the dough

For the Poornam
Jaggery - 2 cups ( Depending on your taste )
Toor Dal ( Thuvaram Paruppu in Tamil / Kandi Pappu in Telugu) - 2 Cups
Channa Dal ( Kadalai Paruppu / Senaga Pappu) - 1/2 cup
Cardamom Powder - 1 tbsp
Nutmeg Powder - 1/4 tsp ( Jaathikai / Jajikai )
Ghee - 1 tbsp
Fresh Coconut Flakes - 1 cup
Variations 
  1. You can add a pinch of Kesar Yellow food colour if you want your Poli to be colourful but its  optional.
  2. You can add mashed sweet potatoes 1 or 2 with the cooked dal to make it more tastier and healthier. 
Method of Preparation

  1. Make a dough out of whole wheat flour, little maida , salt and oil like how you make  a dough for a normal chappathi. Keep it aside for sometime.
  2. Wash the dals and cook it in a pressure cooker for 4-5 whistles till it becomes soft and mashy.
  3. On a thick bottomed vessel, add the cooked dal, fresh coconut flakes, crushed jaggery to make the pooranam. Mix thoroughly and stir for sometime till the jaggery gets melted and form a thick paste.
  4. Finally add the cardamom powder, nutmeg powder, ghee to the pooranam.
  5. Stir patiently on a medium heat so that it does not stick to the bottom.
  6. When it comes to a texture enough to make small balls, turn the heat off and allow it to cool.
  7. When you are ready to make the Poli, start making small balls of pooranam and keep it ready.
  8. Make a big round chappathi using the dough, keep the pooranam in the centre and cover it fully.
  9. Then slowly roll it bigger and bigger by flipping it with that maida flour. Here, the maida really helps to make the Poli in proper shape with all pooranams inside.
  10. Then fry the Poli on both sides on a frying pan on medium heat with little oil.
  11. This is one of our favourite sweet in our house as it consumes very less oil and good for kids as it has very good protein value too.
Tips

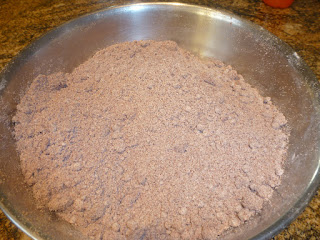
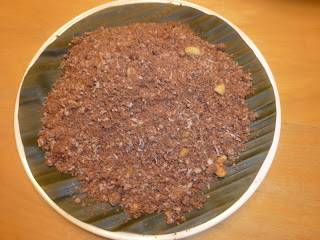
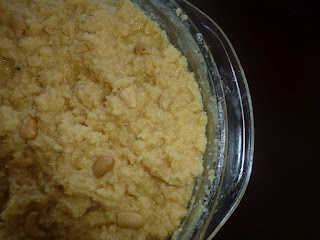
  1. While making the Poornam, try not to add water as it might get sticky. This in turn makes it difficult to spread the Poli / Bobbattus.
  2. While making the dough, try to make it in right consistency like not too loose and not too tight. Should be medium easier for us to spread the bobbattus.
  3. While frying the Polis/Bobbattus in the frying pan, try not to add ghee at that stage. Store all the Polis/Bobbattus in a plate. Just before serving, add some hot ghee and enjoy. I personally feel that adding at the end makes it tastier and better.

Thiruvadhirai Kali

Thiruvadhirai Kali


Thiruvadhirai Kali is a sweet dish which we make on the day of "Arudhra Darshan" and offer to Lord Shiva. This sweet is made with rice rava cooked in Jaggery syrup and flavoured with cardamom and fresh coconut flakes. With few drops of ghee/clarified butter, the taste is divine. You can substitute the raw rice with brown rice and try this out with the same procedure..if you wish to avoid white rice. I made this sweet dish by adopting a simpler method.
Ingredients
White Sona Masoori Rice - 1.5 Cups
Jaggery - 2 Cups
Cardamom Seeds - 5 to 6
Fresh Coconut Flakes - 3/4 cup
Ghee - 1 tbsp
Method
  1. Wash the Sona Masoori Rice and roast them in a frying pan till you get nice aroma and switch off the gas when it turns golden brown. Keep it aside.
  2. When it cools down, grind them coarsely like rava and keep it ready.
  3. Cook the grounded rice rava in a pressure cooker for 2-3 whistles by adding 3.5 cups of water.
  4. Meantime, make the Jaggery syrup in a separate thick bottomed vessel. Switch it off and keep it ready.
  5. Crush the cardamom seeds and make a fine powder and keep it ready.
  6. After the cooker cools down, transfer the cooked rice rava into the jaggery syrup slowly without making lumps.
  7. On a very low flame, add the cardamom seeds, coconut flakes, ghee and stir them thoroughly for 3-4 minutes.
  8. Switch off the flame. Now the Thiruvadhirai Kali is ready for Neivedhyam.

Sunday 3 September 2017

Healthy Multigrain Bread Puttu


Since few days, I have been thinking of making something different with the big loaf of Multigrain bread remaining in the bread basket. Really bored of the regular Bread Jam, Bread Peanut butter, Bread with Nutella. Though I heard of this bread puttu from one of my friends, I never get a chance either to make it  or taste it before. I followed the regular procedure for making this puttu without a traditional puttu maker. It came out decently and it could be served with some uppuma ( with rava, semiya ) as a combo for breakfast. It will definitely be an ideal and healthy breakfast for kids. Preparation time for this puttu is also very less...So, don't get scared with the second loaf of any bread variety which you buy from the wholesale stores ( like Costco, BJs)...The second loaf can easily be consumed by making this variety too....
Ingredients
Multigrain Bread - 1 full loaf
Ghee - 2 tbsp
Cardamom Powder - 2 tsp
Cashew Nuts - 2 tbsp
Fresh Coconut flakes - 1/2 a cup
Sugar - Between 1/4 to 3/4th of a cup ( depending upon the sweetness of the bread )
Method
  • Grind the remaining loaf of the Multigrain bread in a mixer grinder.
  • Mix the bread puttu powder with the fresh coconut flakes and steam them together in a vessel for 5 -10 minutes. As I don't have the puttu maker, I steamed them by keeping the puttu vessel inside a big kadai and covered the kadai with the lid. After its steam cooked completely, keep the steamed puttu ready.
  • On medium heat, add ghee into the kadai. When its heated, add the cashew nuts and fry them for few minutes till they get golden brown.
  • Add the steamed puttu mix to the kadai.
  • Add the cardamom powder and sugar to the puttu now.
  • Mix them all well for few minutes and switch off the flame.
  • Now the healthy puttu is ready with rich taste and good flavour.
Tips
Any variety of excess bread loaf can be converted into puttu form.!!! Though its a healthy option, multigrain puttu variety would be little heavy, so its difficult to eat more quantity whereas the wheat bread puttu is softer and can be eaten easily by kids.

Saturday 2 September 2017

Badam Halwa / Almond Halwa

Badam Halwa / Almond Halwa is a very rich sweet which is generally made in marriages or during special occasions. Halwa in general is made with the nutty paste, ghee and sugar syrup. Taste of any Halwa would be delicious if its slightly warmed before eating. A pinch of saffron strands would definitely enhance the taste of this rich halwa and also its flavour. Though it takes good amount of preparation time, the final output is really worthy for that time. My sister gave me a tip to fasten the process. With her experience, she told me that the almond paste made with water takes lesser time to get cooked and come to the Halwa consistency than the paste made with milk and water. Amount of ghee to this Halwa is not more if its added at the end of the process. So, I can confidently say that the process can never go wrong and also its not eating so much ghee. So happily we can enjoy few spoons of Almond Halwa during this festival time.

Ingredients
Almonds - 2 Cups
Sugar - 1 Cup
Ghee - 3-4 tbsp
Cardamom Powder - 1 tsp
Yellow / Kesar Orange food colour - 1 pinch
Saffron - A pinch in luke warm water.
Method
Blanching Almonds
Soak the Almonds in water overnight and peel the skin off the almonds the next day. This is the regular method which we generally follow for blanching. You can also soak them in warm water or hot water and peel their skin off after few hours. Follow any method whichever is simpler and easier for you.
Making Almond Paste
Grind the blanched almonds using a mixer grinder to a fine, smooth paste by adding little water. I don't add milk while grinding the almonds at all. Keep the almond paste ready.
Making Sugar Syrup
In a thick bottomed vessel, add 1 cup of sugar and 1/2 a cup of water and make a thick sugar syrup. Add a pinch of food colour to the sugar syrup.
Making Saffron Syrup
In a small cup, add 2 tsp of hot milk and add a pinch of saffron strands. Leave them for few minutes. Then you would see the saffron strands melted and the colour of the milk would have turned kesar yellow/orange. Keep this syrup ready.
Halwa Preparation
  • Transfer the Almond paste into a thick non-stick kadai / round pan. Cook the paste by closing the lid for sometime and stir the paste constantly.
  • Add the sugar syrup into the paste and mix them well. Stir the mix continuously so that the almond paste thickens and come to the Halwa consistency. This would take some good amount of time. So, patiently stir the mixture in the kadai. You can fasten the process by closing the lid and cooking them on a low flame. This would thicken the paste to some level and then stir the mix again by opening the lid for sometime.
  • Add the powdered Cardamom powder and the saffron syrup into the Halwa Mix.
  • Check the consistency of the Almond Halwa now. If its almost closer to the Halwa consistency, add 3 tbsp of ghee into the Halwa. Stir them again for sometime and finally the Almond Halwa would come in shape with good aroma and taste.
  • Switch off the flame. Transfer the Halwa into a suitable container and sprinkle some fried cashew nuts if required. Also, you can sprinkle few saffron strands just before serving...
Variations
Instead of cooking and stirring the Halwa mix in the stove, you can microwave the Halwa mix and fasten the process too.

Aval Sakkarai Pongal / Sakkarai Pongal using Poha

Aval Sakkarai Pongal / Sakkarai Pongal using Poha


Aval Sakkarai Pongal is one of the quickest sweet that we could make during festivals. I made this tasty pongal for Rama Navami along with Panagam and Buttermilk. I always tend to make something out of Aval / Poha during regular days itself as it makes the process easier and quicker. Aval Tamarind Upma, Aval Payasam, Aval Curd item are some of  my own favorites.
Ingredients
Thick Aval / Poha - 1 Cup
Jaggery - 3/4 cup
Cardamom Powder / Elachi - 1 tsp
Pachai Karpooram - 1 small pinch
Cashew nuts - 2 tsp
Ghee - 3 tsp ( Add more if you like..)
Method
  1. In a separate vessel, make the Jaggery syrup with little water. Drain the impurities or any dirt from the syrup and keep it ready. Consistency of the syrup should be neither watery nor thick. Should be in the middle form.
  2. Wash the poha/aval and add it directly to the cooking pan/kadai. Add some water for the poha to get cooked. Close the lid and let the aval cook for 2-3 minutes.
  3. When its cooked three fourth, add the jaggery syrup, cardamom powder, crushed pachai karpooram, ghee roasted cashew nuts and stir them well till it thickens.
  4. Add ghee at the end and switch off the flame.
  5. Flavorful sweet pongal is done within minutes and ready for prasadam.
Tips/Variations
Add good amount of ghee on top for kids which makes it more tasty... 

Mango Kesari and Tomato Rava Bath Combo

Mango Kesari and Tomato Rava Bath Combo


To celebrate our wedding anniversary, I made another version of  Chow Chow Bath this morning for breakfast. This time, I made a combo of "Mango Kesari" and "Tomato Rava Bath/Upma".  Using this concept, try creating chow chow bath with different combinations of Kesari and Upma and enjoy...

My Hearty Thanks to all my dear blogger friends for visiting my food blog. Today I am happy to see that the Blog visits crossed 10000. Thank you all once again for your support.
Mango Kesari
I used a fresh Mango for making this yummy kesari. Peel the skin and take out all the mango flesh. Follow the same method of preparing regular kesari and add the mango flesh when rava starts cooking. For good flavour and colour, I added few strands of Saffron to this Kesari. Did not add food colour to this version. All other ingredients and method of preparation remains the same as normal kesari.

Tomato Rava Bhath / Upma
We love to have a tangy, spicy upma any time of the day. In this version, I just added 3 tomatoes along with some red onion, peas, green chillies and ginger. Again, the ingredients and the method remains the same as normal rava upma.

Friday 1 September 2017

Adhirasam \ Ariselu

Adhirasam or Ariselu, a traditional South Indian Sweet is one of the mandatory sweet included in the "Seer Bhakshanams" during marriages. "Seer Bhakshanams" are the sweets and savouries made by the bride's side and sent to the groom's side along with the bride after marriage. Also, its also made during some festivals too.. I made this Adhirasam \ Ariselu on the day of "Kartika Pournami" for prasadam. Though its my first try, it did not disappoint me at all and to my surprise, the Adhirasams did not drink that much oil too....Though i know the actual traditional method of making Adhirasam \ Ariselu, I wanted to make the process simpler this time. So I tried using Swad Rice Flour instead of  following the traditional way. This was a huge success to me as all the Adhirasams got over the next day itself, and my kids loved the Adhirasam and grabbed few on their own. After making these yummy Adhirasams, I realised that its a "No Big Deal" sweet surely and we can make and enjoy them at any time.
Ingredients
Rice Flour - 2 Cups
Jaggery - 1 Cup
Cardamom Powder - 2 tsp
Sukku Powder \ Dry Ginger Powder -  1 tsp
Oil - To fry the Adhirasams
Method
  • Fry the rice flour for few minutes and keep it aside.
  • Add the jaggery pieces or powdered Jaggery which comes to 1 Cup into a vessel and add a cup of water. Make the Jaggery Syrup carefully. The consistency of the jaggery Syrup decides the final outcome, so this process needs more attention.
  • While making the Syrup, check to see whether the string consistency has arrived. Take a small amount and drop it on water in a container. It should float and you would be able to make a small ball out of it.
  • Take out the syrup from the stove. Add the cardamom powder and Ginger powder to the syrup and mix it well.
  • Slowly add the rice flour into the Jaggery Syrup without making any lumps. Mix the rice flour thoroughly with the Jaggery Syrup and keep it aside.
  • After 3-4 hours, heat oil in the frying pan. When the oil gets heated, take a small ball of the Adhirasam dough, make a small round using your hand itself or on a plastic paper and slowly drop this into the heated oil.
  • Allow the Adhirasam to get fried on both side equally. Then, drain the excess oil if any and keep the Adhirasam on a tissue paper.
  • Continue the same process for the rest of the Adhirasam Dough. At a time, I dropped 4-5 Adhirasams into the oil and drained them. It depends on your kadai size and speed. You can drop more too if you have a bigger frying pan.
  • Finally, arrange all the fried Adhirasams\Ariselu on a plate for Neivedhyam.
Tips \ Variations
Instead of rice flour, you can follow the traditional method of making the rice flour by soaking raw rice in water, drying them on a cloth and then grinding the semi wet rice into rice flour. By following this method, the Adhirasams would be much softer and tastier.  Next time, I am planning to adopt this method and try them out.
If you make the Jaggery Syrup as I mentioned above and take it out of the stove at the right time, these Adhirasams also would be a definite hit.

Pesarapappu Boorelu - Traditional Andhra Festive Sweet

Boorelu , a delicious sweet is a sign of Joy, Happiness which is made in every household of Andhra during the festive days.  This golden sweet ball has a yummy pooranam inside which is covered by a dough, fried in oil. Generally, the Pooranam is made out of Channa Dal or Moong Dal with Jaggery Syrup or Sugar Syrup. Boorelu made with the Channa Dal ( Senaga pappu ) poornam is called as "Senaga Pappu Boorelu" and its called as "Pesara Pappu Boorelu" if its made with Moong Dal ( Pesara Pappu) poornam. For Kartika Pournami, this time I made the Pesara Pappu Boorelu for Prasadam. Process time for making this mouth watering sweet is little longer due to the preparation of Dough and Poornam separately. But this will get compensated completely after seeing the delightful golden sweet balls on your plate.
Ingredients
For the Dough
Raw Rice -- 1 Cup
Idly Rice --  1\2 Cup
Urad Dal \ Minna pappu -- 3\4 of a cup
Water -  Little to Grind
Salt --- To Taste
For the Poornam
Moong Dal \ Pesara pappu -- 2 Cups
Cardamoms -- 7 or 8
Powdered Sugar -- 1 Cup
Shredded fresh coconut -- 1 Cup
Ghee -- 2 tsp

Oil -- For Frying the Boorelu

Method
  • Soak the rice and Urad Dal together in a bowl of water for 3-4 hours and grind it in a wet grinder like a Dosa Dough. Add required amount of Salt to the Dough and mix it. Keep the Dough ready for making the Boorelu.

  • Soak the Moong Dal in a bowl of water for an hour. Grind the Moong Dal with very little water and make a paste.  Using the Idly Maker, steam the Moong Dal paste and cook them completely. Take out the Poornam Idlies from the Moulds and grate them using a normal grater or using a food processor or regular mixer grinder. 


  • Add shredded coconut, powdered sugar, cardamom powder, ghee to the vessel on top of the grated Moong Dal and mix them together.  Make small balls of the Poornam and keep them ready.


  • Heat oil in a frying pan.. Take one poornam ball and dip it inside the Dough and drop the Boorelu into the heated oil carefully. Make sure that the dough covers the poornam completely. Likewise, drop 4 or 5 Boorelu into the oil and fry them till golden brown and drain them.
  • Finish the process with the remaining dough in the same way and arrange the Boorelu on a plate for Prasadam. If any excess dough is left, add some seasonings to the dough and fry them separately like mini vadas. Excess Poornams can be eaten as it is like a laddu.