search the web

Showing posts with label vegetable curry. Show all posts

Monday, 18 September 2017

how to make Cheppankizhangu Fry / Cheppankizhangu Varuval / Chamadhumpa fry / Colocasia Fry / Taro Root Fry / Chamadumpa Fry

Cheppankizhangu Fry / Cheppankizhangu Varuval / Chamadhumpa fry / Colocasia Fry / Taro Root Fry / Chamadumpa Fry


Start with, I am giving my version of Cheppankizhangu Fry ( Taro Root / Colocasia Fry ).  Though I love this fry, somehow I was not a big fan of that sticky kozha kozha Cheppankizhangu Fry. To avoid that stickiness, I tried a different method to make the curry more delicious and presentable. My family loved this version and the appreciations at home made me to present this to you all in my blog confidently. This fry is definitely going to be an excellent side curry during any occasions. Instead of having our regular Potato fry, try to substitute this yummy Cheppankizhangu Fry in your menu and see the difference. Your comments and suggestions are always welcome to improvise this dish and also my blog.

Ingredients

Cheppankizhangu -  15 to 18
Oil - 2 tbsp
Hing - 1 Dash
Mustard Seeds - 2 tsp
Urad Dal / Ulutham Paruppu - 2 tsp
Curry Leaves - 1 Stem
Turmeric Powder - 1 tsp
Red Chilli Powder - 3 tsp
Sambar Powder - 1/2 tbsp
Coriander Powder - 1 tsp
Salt - As required
Rice Flour - 1/2 tbsp

Method

  • Peel the skin of the Cheppankizhangu and cut them into mini rounds or any shapes you desire. Generally the mini rounds would get fried uniformly and are best suited.
  • In the frying pan, add the oil and heat it on medium flame. When its heated, add hing, mustard seeds, urad dal and curry leaves in order and when the tempering process is done, add the mini rounds of Cheppankizhangu into the kadai carefully.
  • Add the turmeric powder alone first into the kadai and add little water ( about 1/2 a glass ).
  • Allow the cheppankizhangus to cook on low flame for nearly 10 minutes. Stir it in the middle and add little more water if required while cooking. When its cooked three fourth, add required amount of salt into the kadai / pan.
  • When the cheppankizhangus are completely cooked to your satisfaction, add the other powders and little more oil into the pan.
  • Coat the cheppankizhangu rounds with all these powders on all sides and allow them to get fried uniformly on medium flame. Flip the rounds carefully during this process.
  • When they turn golden brown, switch off the flame. Let the curry remain in the pan till you actually serve.

Sunday, 17 September 2017

Alu Gobi / Aloo Gobi / Aloo Gobi Masala

Alu Gobi / Aloo Gobi / Aloo Gobi Masala

 Aloo Gobi / Potato Cauliflower Curry is one of the quickest and easiest curry for rotis / chapathis and its mostly liked by all ages. I regularly make this curry for my rotis when I have very less preparation time. If its made with fresh Gobi ( cauliflower ), the aroma is very good. Aloo Gobi flavored with all the aromatic spices is definitely a very good accompaniment to rotis or pulav.
Ingredients
Gobi / Cauliflower - 1 Medium
Aloo / Potato - 4 or 5 Medium
Tomato - 1 Medium
Onion shredded - 1/2 cup
Oil - 1 tbsp
Cumin Seeds / Jeera - 1 tsp
Pattai / Cinnamon Stick - 1 Medium
Bay Leaves - 2 Medium
Ginger Garlic Paste - 1/2 tbsp
Green Chili - 1 finely chopped
Coriander Leaves - To Garnish
Turmeric Powder - 1 tsp
Garam Masala Powder - 2 tsp
Coriander Cumin Powder / Dhana Jeera Powder - 1 tsp
Red Chili Powder - 1 tsp
Salt - To Taste
Method
  • Peel the skin off from the potatoes and cut them into cubes of any size as desired. I cut them into medium chunks. Take out the cauliflower florets and wash them with warm water.
  • Cut the onions, tomato, green chili and keep all the other ingredients ready.
  • In a frying pan / kadai, add oil first. When its heated, add cumin seeds, cinnamon stick, bay leaves, ginger garlic paste and fry them well.
  • Then, add the shredded onion, green chili into the kadai and fry them for a minute. When the raw smell goes off, add the tomato pieces and fry for a minute.
  • Add the cauliflower florets and the cooked potato cubes ( in case if you cook the potatoes separately in a microwave ) to the kadai. If you don't intend to cook the potatoes separately, then add the potatoes into the kadai with enough water for them to get cooked.
  • When the potatoes are cooked three fourth, then add all the washed cauliflower florets into the kadai
  • and cook them again on medium flame.
  • When the vegetables are cooked to your satisfaction, add all the powders into the kadai and required amount of salt.
  • Make sure that the aloo and gobi pieces are coated uniformly with all the powders. Fry them on medium flame for 4-5 minutes.
  • Garnish with coriander leaves and serve with your hot rotis or rice pulav.
Variations / Tips
  • You can either cook the potatoes separately and add to the kadai or add the uncooked potatoes directly into the kadai and cook them during the process.
  • Don't cut the cauliflower florets smaller as they might get smashed while cooking.
  • Instead of adding tomato, sometimes i do substitute with Mango powder to inject some sourness into the dish. 

Amaranth Kootu / Keerai Kootu

Amaranth Kootu / Keerai Kootu

Amaranth leaves, which are called as "Mulai Keerai" in Tamil seem to be rarely available here. I really miss all the green leafy vegetables like Siru Keerai, Manathakkali Keerai, Ponnanganni Keerai, etc., So, whenever I see these nutritious greens in the Indian stores, I grab atleast two bunches. Eating greens at least twice a week keeps us healthy and young and they fight against various diseases. In my childhood, my mom used to make two vegetables in a meal in the middle of her hectic schedule too. Out of that, Mulai Keerai Masiyal or Murungai Keerai curry or any other green varieties would definitely be there. I was fortunate to taste all these healthy greens frequently when  I was young whereas I could not get those right now except few varieties..
Amaranth / Mulai Keerai gives a wonderful flavour while cooking and its highly nutritious. We can do Masiyal, simple dal, curry or any other variety out of these tasty, healthy leaves. This time, I tried Keerai Kootu for a change and i added few cooked dal in my process. You can avoid the cooked dal while making this kootu and its optional. Generally while making this kootu, they don't add cooked dal but i added some to make it more healthy for my kids. Without dal too, it tastes excellent with the grounded paste.
Ingredients
Amaranth Leaves / Mulai Keerai / Thandu Keerai - 1 Big Bunch
Cooked Toor Dal Paste - 2 tbsp
Hing - 1 Dash
Salt - As Required
Turmeric Powder - 1 tsp
Sugar - 1 pinch
For the Grounded Paste :
Fresh Coconut Flakes - 1/2 cup
Cumin Seeds / Jeera - 1 tsp
Green chillies - 2 Medium or 1 Big
Ginger - 1 tiny square
For Tempering / Tadka :
Oil - 2 tsp
Mustard Seeds - 1 tsp
Jeera / Cumin Seeds - 1 tsp
Urad Dal / Ulutham Paruppu - 1 tsp
Kadalai Paruppu / Channa Dal - 1 tsp
Dry Red Chillies - 1 big
Procedure :
  • Wash the Amaranth Leaves / Mulai Keerai and chop them. Meantime, grind the ingredients for the grounded paste and keep it ready.
  • In a vessel, add all the chopped green leaves, turmeric powder, hing, pinch of sugar and some water and allow them to cook thoroughly on medium heat.
  • Cook the toor dal / kandhi pappu / Thuvaram paruppu in a separate cooker and keep it ready too...
  • When the amaranth leaves / toor dal is completely cooked, add the toor dal into the Keerai. Add some salt and the grounded paste into the vessel and allow them to cook for another 4-5 minutes/
  • Finally add tadka into the keerai kootu and serve this healthy side dish in your thali or meals.

Saturday, 16 September 2017

Cauliflower Curry / Cauliflower Poriyal - Type 2

Cauliflower Curry / Cauliflower Poriyal - Type 2


This version of Cauliflower curry is spicy and its similar to the ones served in a vegetarian thali in restaurants.  This spicy curry / poriyal is a good choice to be considered on any special meal.
Ingredients
Cauliflower - 1 medium
Red Onion - 1 Small or 1/2 medium
Tomato - 1 Big
Grated Ginger - 2 tsp
Crushed Garlic Paste - 3 tsp
Finely cut Green Chilli pieces - 1 tsp
Oil - 1 tbsp
Hing/Asafoetida - 1 Dash
Mustard Seeds / 2 tsp
Sombu / Fennel Seeds - 1 tsp
Urad Dal - 2 tsp
Channa Dal - 1 tsp
Curry Leaves - 5 or 6
Coriander leaves - To Garnish
Turmeric Powder - 2 tsp
Red Chilli Powder - 3 tsp
Coriander Powder - 1 tsp
Salt - To Taste
Method
  1. Wash and Clean the Cauliflower florets thoroughly and keep them aside.
  2. In the cooking pan, add oil first. Finish the tempering process by adding Hing, Mustard Seeds, Sombu, Urad Dal, Channa Dal, Curry Leaves first.
  3. When its done, add the Garlic Paste, crushed ginger, onion into the Pan. Fry them till the raw smell vanishes off completely.
  4. Add the tomato pieces into the pan and allow them to cook for a minute with the lid closed.
  5. Mash them when its done and finally add the cauliflower florets into the kadai.
  6. Add the turmeric powder to the florets and allow them to cook for few minutes with the lid closed on a medium flame.
  7. When the florets are cooked enough, add all the powders and required amount of salt into the pan and mix them well.
  8. Fry the contents of the pan uniformly on all sides for another 4-5 minutes.
  9. Switch off the flame and garnish with coriander leaves and serve.
Tips / Variations
  1. You can microwave the cauliflower florets and add them into the pan to fasten the cooking process.
  2. You can customize the spicy powder quantity according to your taste buds.
  3. You can omit the Garlic, Ginger ingredients too while making this curry if you don't want to.

Friday, 15 September 2017

Kathirikai Kalyana Curry / Brinjal fry / Vankaya Fry

Kathirikai Kalyana Curry / Brinjal fry / Vankaya Fry


Brinjal ( Kathirikai/Vankaya) is one of the special vegetables and is mostly made on special occasions in a very delicious way. I like this special type of Brinjal fry which is served in marriages mainly in "Maapillai Azhaippu".

Ingredients
Brinjal - 12 ( Small or Medium size)
Turmeric Powder - 1 tsp
Asafoetida - 1 tsp
Salt - 1 tbsp ( Enough to taste).
For grinding
Channa Dal ( Kadalai Paruppu / Senaga Pappu) - 4 tbsp
Coriander Seeds - 3 tbsp
Red Chillies - 5 or 6 ( Medium ).
Coconut Shredded - 2 tbsp.
For tadka
Mustard Seeds - 2 tsp
Jeera - 1 tsp
Urad dal - 2 tsp
Curry Leaves - 1 bunch ( 7 or 8 ).
Method
1. Wash the brinjals and cut each brinjal into 4 halves and put it in a bowl of water.
2. On the stove, put the oil and add the ingredients one by one for tadka.
3. Then, add the brinjal on the oil and fry for 1-2 minutes.
4. Add the turmeric powder and salt to the brinjal.
5. Add little water and cook the brinjals till its cooked nicely. Make sure that the brinjals do not become too soft or mashy.
6. Meantime, grind the powder and keep it ready.
7. To the cooked brinjal, add the grinded powder and fry the curry for 5-6 minutes.
8. This brinjal curry serves as a good side dish with rice, chappathi.
Variations
You can add some chilly powder separately if you want to have more spicyness ( karam) in the curry. But I prefer to have the karam in moderation so that the curry shows all the tastes and flavours equally.

Pavakkai Fry - BitterGourd Fry

Pavakkai Fry - BitterGourd Fry


Bitter Tasting "Pavakai"/ "Bitter Gourd" are not liked by many people due to its bitter taste. But looking at the nutrient side, its highly recommended and good for diabetic people. Bitter Gourd is very low in calories and has twice the amount of Calcium, Potassium,beta-carotene found in Spinach, Banana and Broccoli respectively. I generally include this vegetable in my regular cooking at least once a week. And we could make this in different forms like Pavakai Pitlay, Pavakkai Fry, Stuffed pavakai, Pavakai Sambar,Pavakkai Vethalkuzhambu etc., Of all, I love to make Pavakkai Curry with a little sweet, tangy, bitter and spicy taste. Small round pavakkais are best suited for making this variety. As I don't get that often in my place, I tried to make this curry using a bigger Pavakai. Its a good combo with Mor Kuzhambu.
Ingredients
Fresh Bitter Gourd - 4 or 5 cut into tiny pieces 
Thick Tamarind juice - 2 tbsp
Jaggery grated - 1 to 2 tbsp
Red Chili Powder - 3 to 4 tsp
Turmeric Powder - 1 tsp
Hing/Asafoetida - 1 Dash
Salt - To Taste
Oil - 2 tbsp
Mustard Seeds - 2 tsp
Urad Dal/ Minna Pappu/ Ulutham Paruppu - 1 tsp
Curry Leaves - 1 stem

Method
  • Wash the Bitter Gourd and cut them as shown in the picture.
  • Microwave the Pavakai along with the tamarind extract and very little water in the Microwave oven.
  • In the frying pan, add oil first. When its heated, add the Mustard Seeds, Urad Dal, curry leaves. When they get roasted to golden brown, reduce the flame to complete low and add the cooked Pavakai pieces.
  • Add the turmeric powder, jaggery, salt, red chili powder and mix them well.
  • Allow them to cook with a lid on for another 2-3 minutes.
  • Open the lid and fry them on medium flame till the size of the Pavakai pieces get reduced to some extent.
  • Switch off the flame and enjoy this with hot rice.

Thursday, 14 September 2017

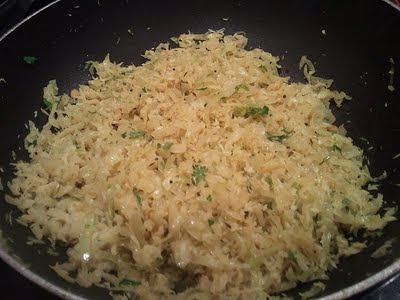
Cabbage Poriyal / Cabbage Fry

Cabbage Poriyal / Cabbage Fry


Cabbage being an excellent source of Vitamin C, is also a low calorie food. Also, cabbage is highly recommended for slowing down growing cancer cells.

Many people does not show interest in this curry. They even show their disappointment if its included during any special meal or parties. But if
the curry is made with good care, it can be made more attractive and tastier
too.

Ingredients
Cabbage - 4 cups nicely cut into thin slices.
Shredded coconut - 1/4 cup.
Mustard seeds - 2 tsp.
Jeera - 1 tsp
Urad dhal - 1/2 tbsp
Channa Dhal - 1/2 tbsp
Curry leaves - 4 or 5.
Coriander leaves - 1 tbsp.
Turmeric Powder - 1/2 tsp.
Salt - To taste.
Green chilli Paste - 1 tsp.
Ginger - 1/2 tsp ( nicely grated)
Olive Oil - 1 tbsp.
Asafoetida / Hing - 1/2 tsp

Method
1. Cut the cabbage into thin slices or in any shape you desire.
2. Wash and drain the cut cabbage and keep it separately.
3. On the kadai, add olive oil and heat it. Add asafoetida/hing, mustard seeds, jeera into the heated oil.
4. When it sputter, add urad dal, channa dal, green chilli paste, curry leaves ( if you have) to the oil.
5. After sauting for a minute, add some turmeric powder into the oil itself.
6. Finally add the cabbage into the kadai. Mix it thoroughly and sprinkle some water into the kadai and close it.
7. Let the veggie mix cook for 3-4 minutes on a low flame.
8. Sprinkle some more water in the middle if its not fully cooked. But dont overcook cabbage, dont make it mashy like a halwa. This will ruin the taste and texture of the cabbage curry.
9. Add salt and grated ginger at the end and mix it. Let it remain in the stove for another minute.
10. Open the lid and see if you are able to see the cabbage slices separately. If so, then add the shredded coconut to the veggie mix and (As curry leaves are rare here, i added coriander leaves to the curry.)
12. Now the cabbage curry is ready to be served in a meal.

Variations
You can add fresh peas or grated carrots to the curry for better taste, for better colour. It will make it look richer on special occasions.

Wednesday, 13 September 2017

Murungai keerai Paruppu Usiliyal ( Drumstick Leaves Dal Fry )

Murungai keerai Paruppu Usiliyal ( Drumstick Leaves Dal Fry )


Murungai Keerai ( Drumstick Leaves ) is a significant source of  beta-carotene, Vitamin C, protein, iron and Potassium. Its widely used in the Siddha Medicine in India. So, a combination of this rich drumstick leaves and high protein dals ( Paruppu) will be one healthy side in a meal.
Looking at these drumstick leaves in one of the Indian groceries in California, i decided to buy more and try out different dishes here at home. First I tried the "Murungai Keerai Paruppu Usiliyal" , a recipe from my Mom.
Ingredients
Drumstick Leaves  -  1 Big Bunch. ( Leaves would come for 4-5 cups fully ).
Toor Dal ( Thuvaram Paruppu / Kandhi Pappu ) -  1/2 cup
Moong Dal (  Payatham Paruppu / Pesara Pappu ) - 1/3 cup
Channa Dal - 2 tbsp
Urad Dal - 2 tbsp
Red Chillies Dry - 5 Medium Size
Hing ( Asafoetida ) - 2 tsp
Olive Oil - 4-5 tbsp.
Salt - To Taste.
Turmeric Powder - 2 tsp.

For tempering
Mustard Seeds - 1 tbsp
Jeera - 1 tbsp
Urad Dal - 2 tsp
Curry Leaves - 7-8 ( if you have )
Red Chilly Dry - 1 Medium

Method
  1. Soak the Dals ( all paruppu/pappu) in water for 40 mts first. After 40 mts, drain all the water from the dal. Grind it with red chillies , little hing , very little water to make it pasty.  Keep the paste aside.
  2. Remove the drumstick leaves from the stem carefully. Wash the leaves and cook it in the microwave for 3-4 minutes till its cooked.
  3. On medium heat, add oil first. When its heated , start adding the ingredients for tempering one by one.
  4. First add the grinded dal mixture into the kadai. Mix it in the tempered oil slowly.
  5. Add 2 tsp of turmeric powder and some salt into the dal mixture now.
  6. Stir the dal mixture from top to bottom for 1-2 minute and close the lid. Let it cook on medium heat for few minutes.
  7. During this process, keep stirring the dal mixture so that it does not stick to the bottom of the kadai. Generally due to steam it wont stick to the bottom.
  8. When you feel that the dal mixture is cooked three fourth, add the cooked drumstick leaves into it. Mix the leaves and paruppu mixture thoroughly.
  9. Add some more salt and close the lid for 3-4 minutes on medium heat.
  10. Then, keep the lid open and fry for few more minutes ( 5-6 minutes ). Keep stirring the mixture constantly and patiently.
  11. Switch off the heat when you feel that the veg-dal mixture is cooked and slightly fried. You can make out easily as the leaves and the dals become separate and wont be that pasty. It will look like a sundal.
Variations
You can also steam the Dal Mixture ( Grinded Paruppu Mixture ) in Idli cooker and add it while making the vegetable. In this way, the dish will get done quickly and also with less oil, less effort. But today i wanted to try it in this way.
You can choose the Paruppu / Pappu / Dals in the Usiliyal Mixture. We always try to avoid having more channa dal in this mixture.

Tips
You can add some red chilly powder if you feel that the usili is not spicy enough.
You can steam the Dal Mixture instead of slowly cooking the Dal Mixture in the kadai itself.

Tuesday, 12 September 2017

Mixed Vegetable Fry

Mixed Vegetable Fry

Having few leftover veggies not enough to make a complete curry. No worries. I had 2 brinjals, 2 potatoes, 3 or 4 drumsticks and only one tomato. I decided to make a simple, mixed vegetable fry which played as a good side dish with rasam rice for us.

Ingredients
Brinjals - 2 big size cut into small cubes
Potatoes - 2 Medium Size cut into small cubes
Drumsticks - 3 or 4 cut into small finger size
Onion - 1 medium size
Tomato - 1 medium size
Frozen Peas ( cooked ) - 1 handful
Curry Leaves - 1 stem ( if you have )
coriander leaves - 1 handful
Asafoetida / Hing - 1 pinch
Mustard seeds - 2 tsp
Jeera  - 1 tsp
Red chilly dry - 1 medium size
Urad Dal / Ulutham Paruppu / Mina Pappu - 1 tsp
Turmeric Powder - 1 tsp
Red Chilli Powder - 1 tbsp ( Depends on your taste )
Sambar Powder - 1/2 tbsp
Salt - To taste
Sugar - a small pinch
Olive Oil - 2 tbsp

Method
  1. Wash the vegetables and cut those into small cubes and keep them aside. Cut the tomatoes and onions too and keep them aside.
  2. Add oil first into the kadai on medium flame. When it gets heated, add mustard seeds, jeera, red chilly dry, urad dal, asafoetida, curry leaves for tempering.
  3. When its done, then add onions and fry it little bit with a pinch of salt. Add turmeric powder to it now.
  4. Then, add cut brinjals, potatoes to the kadai and fry for a minute. Then, cover the kadai with a lid and cook the brinjals, potatoes for 4-5 minutes on medium flame with little water.
  5. Separately cook the drumsticks in the microwave for 3-4 minutes and keep it ready.
  6. When the brinjals and potatoes get cooked, add the cooked drumsticks, peas into the kadai.
  7. Add all the powders as mentioned in 'Ingredients' into it. Also add remaining salt and a pinch of sugar at this stage.
  8. Mix everything thoroughly in the kadai and let it cook openly for 3 - 4 minutes. In the middle, stir the mixture.
  9. After few minutes, when all the vegetables get cooked and fried to your satisfaction, switch off the heat.
  10. Garnish with coriander leaves and serve. An excellent dish with any rice variety.

Sunday, 3 September 2017

Saag Paneer / Mustard Greens Paneer Gravy

Saag Paneer / Mustard Greens Paneer Gravy


"Saag", the green leafy vegetable, also called as "Mustard Greens" is one of the healthiest choice in regular cooking. This contains more anti-oxidants and anticancer effects. Its low in calorie and an excellent source of Calcium, folic acid, vitamins and other minerals. Using this vegetable, there is a famous Punjabi dish called "Sarson Ka Saag" which is generally eaten with Corn Roti ( Makki ki Roti). I added Paneer to this dish and made "Saag Paneer" to attract my kids. Recipe is simpler with less ingredients and the process is also much simpler. As I used less oil, its bit thicker. You can customize the dish and make it in your style.
Ingredients
Saag / Mustard Greens - 1 Fresh Bunch
Tomato - 1 Medium
Red Onion - 1/2 Medium
Ginger Garlic Paste - 1 tbsp
Oil - 1 tbsp
Butter - 2 tsp
Cumin Seeds / Jeera - 2 tsp
Turmeric Powder - 1 tsp
Sugar - 1 Pinch
Salt - To Taste
Green Chillies - 3 or 4.
Garam Masala Powder - 2 tsp
Method
  1. Wash the Mustard Greens thoroughly for three times and drain the sand and other dust particles.
  2. Cut the Mustard Greens, tomato in bigger size and steam cook them in a kadai with no water.
  3. Grind them along with green chillies and keep the paste ready.
  4. On a medium flame, add oil to the cooking vessel / non-stick pan. When its heated up, add cumin seeds followed by cut red onion, ginger garlic paste. Fry them for few minutes till you completely come out of the raw smell...
  5. Add the turmeric powder, garam masala powder, pinch of sugar and stir them for another 2 minutes.
  6. Add the grounded saag paste to the vessel now and add required amount of salt to the vessel.
  7. Mix them well and allow them to cook on a low flame for 4-5 minutes. Finally add the paneer cubes into the saag and mix it well with the cooked saag masala. Cover the lid and allow the saag paneer to remain in the flame for another 2-3 minutes.
  8. Switch off the flame and add little butter or ghee on top just before serving.
Tips / Variations
  • You can shallow fry the paneer cubes instead of adding the raw cubes into the saag.
  • You can add make it in any consistency you want by adding little more water / oil.
  • In place of paneer, you can even add potato cubes and make it attractive for the kids.

Saturday, 2 September 2017

Dondakaya Masala / Kovakkai Masala / Tindora Masala

Dondakaya Masala / Kovakkai Masala / Tindora Masala


Kovakai / Dondakaya / Tindora / Ivy Gourd vegetable is widely used in Indian Cuisine. We prefer to make a simple fry using this vegetable as its a good accompaniment in any meal. But I tried to give a twist with an idea given by my friend and made a gravy " Kovakai Masala". It goes well with both chappathis/ rotis and rice. My dear blogger friends, try this masala once during parties or during the get-together in our regular party menu and I am sure you will elated with the appreciations.!!!
Ingredients
Kovakkai / Dondakaya - 15 to 20 fresh.
Salt - To Taste
Sugar - 1 Pinch
Turmeric Powder - 2 tsp
Oil - 1 tbsp
For Tempering
Hing / Asafoetida - 1 Dash
Mustard Seeds - 2 tsp
Urad Dal / Ulutham Paruppu - 2 tsp
Curry Leaves - 1 stick
For the Gravy Paste
Cashew Nuts - 6 or 7 full
Khus Khus - 2 tsp
Dry Red Chillies - 5 or 6
Coconut flakes - 2 tsp
Ellu / Sesame Seeds - 2 tsp
Groundnuts / Peanuts - Around 10 full
Method
  1. Wash the Ivy Gourd thoroughly and slit them lengthwise and keep them ready.
  2. In a frying pan / kadai, dry roast all the ingredients for making the gravy paste. Transfer them into a mixer grinder and grind them into a thick gravy paste.
  3. In the same pan, add oil first. When its heated, finish the tempering process by adding all the ingredients.
  4. Then, add the cut Tindora into the kadai and fry them for 2 minutes.
  5. Add the turmeric powder and a pinch of sugar and sprinkle some water for the vegetable to get cooked. Cover the pan with a lid and allow the vegetable to get cooked three fourth and not fully.
  6. When its done to that level, add required amount of salt and the grounded paste. Pour some water to the pan if its too thick and not in gravy consistency.
  7. Mix the contents completely and allow them to cook for 5-6 minutes. Stir the masala in the middle to make sure that its not turning black at the bottom.
  8. Cook for few more minutes and switch off the flame after you get the desired gravy consistency. Raw smell of the paste should be off completely and you would notice the oil getting visible on top of the gravy which indicates the completion point.
  9. Switch off the flame and transfer the Ivy Gourd Masala into a serving bowl.
  10. Enjoy this yummy Masala with your favourite rotis/ chappathis or white rice.
Tips / Variations
  1. You can add some red chili powder if the gravy spiciness is not enough.
  2. Don't overcook the vegetable in the beginning stage itself. 

Paneer Mutter / Paneer Peas in creamy tomato gravy / Paneer Matar / Paneer Peas Masala

Paneer Mutter / Paneer Peas in creamy tomato gravy / Paneer Matar / Paneer Peas Masala

 Decided to make some yummy paneer dish for the chappathis last night but I had in mind that it should not be a high caloric dish too...Also, after burning good amount of calories in the fitness center, its not a wise decision to have more calories for dinner. So, I made this Paneer Mutter in rich creamy tomato gravy using a Low Fat Paneer Cubes, less oil and with no ghee or butter, no cream at all...Initially I thought that I might have to compromise on its taste due to my customizations but the taste was amazingly good and tempted us to grab more chappathis. I also could enjoy the dish with no guilt at all. Please see my preparations and I am sure, my friends, you would also enjoy the same and eat with no guilt.
Ingredients
Low fat Paneer Cubes - around 20-25
Frozen Peas / Fresh Peas - 3 handful
Finely shredded Onion - 3/4th of a cup
Oil - 1 tbsp
Cumin Seeds - 2 tsp
Ginger Paste - 2 tsp
Garlic Paste - 1 tbsp
Turmeric Powder - 2 tsp
Red Chilli Powder - 2 tsp
Garam Masala Powder - 3 tsp
Coriander Powder - 2 tsp
Sugar - 1 Pinch
Salt - To Taste
Kasoori Methi / Dried Methi leaves - 2 tsp
Cinnamon Stick - 1
Cardamom Powder - 1 tsp

For the Tomato Gravy
Fresh Tomato - 4 Medium
Green Chilli - 1 Big

For the Cream Gravy
Almonds - 6
Pista - Just 1 ( For good flavour )
Cashew Nuts - Just 2.
Method
  1. Make the tomato gravy paste first by grinding fresh tomatoes with a green chili and keep the puree separately.
  2. Make the creamy gravy paste ready by grinding the nuts as mentioned above with little water.
  3. In the non-stick kadai or any thick bottomed cooking vessel, add oil first. When it gets heated up, add cumin seeds followed by a cinnamon stick.
  4. Add the Garlic paste, Ginger Paste and fry them till the raw smell completely vanishes.
  5. Add the shredded onion pieces and fry along with them. When its fried enough, add the peas and all the powders except salt and fry them in the oil on medium heat for a minute.
  6. Add the tomato gravy paste into the pan and mix them well. Allow them to cook with the lid covered for about 3-4 minutes.
  7. Add required amount of salt, creamy gravy paste ( Nutty paste ) now and mix them well.
  8. Allow them to cook for another 3-4 minutes on low flame.
  9. Finally add the low fat paneer cubes into the pan and mix them uniformly.
  10. Let them to cook with the lid convered for another 1-2 minutes. Switch off the flame.
  11. Serve them after couple of minutes with hot chappathis.
Tips
  1. NO NEED to fry the Paneer cubes.
  2. NO NEED to add any ghee or Butter.
  3. NO NEED to add any cream as you substitute them with a nutty creamy paste.
  4. As we are making with less oil, keep in mind that all the contents need to be fried and cooked properly to get the desired consistency and taste.

Friday, 1 September 2017

Cauliflower Curry / Cauliflower Poriyal - Type 1

Cauliflower Curry / Cauliflower Poriyal - Type 1


Cauliflower is low-fat, low-carb but high in dietary fiber and also loaded with folate, water, vitamin C and reduced the risk of Prostate Cancer. When I got introduced to this vegetable, my mom used to make this version of Cauliflower Poriyal. We loved to grab the small trees / florets of this Cauliflower and imagine eating a small tree. Though I have been making different versions of Cauliflower Curry, Gravy and Fry, this first version always have a unique place in my favourites list. Its a simpler version but it retains the taste of the vegetable perfectly and it goes well with the meals.
Ingredients
Fresh Cauliflower - 1 medium
Green Chillies - 2 or 3  ( cut into small squares )
Fresh Coconut Flakes - 2 tbsp or 1 handful
Oil - 3-4 tsp
Hing/Asafoetida - 1 Dash
Mustard Seeds - 2 tsp
Urad Dal / Ulutham Paruppu - 2 tsp
Curry Leaves - 4 or 5
Salt - To Taste
Coriander Leaves - For Garnishing
Method
  1. Take out the Cauliflower florets from the stem and wash them thoroughly with warm water just to kill any germs or insects if present.
  2. Drain the florets and keep them ready.
  3. In a kadai / pan, add oil first. When it gets heated up, add Hing, Mustard seeds, urad dal, curry leaves, green chili pieces and fry them.
  4. Add the Cauliflower florets, peas into the pan and sprinkle very little water on its top. Cover the lid and allow them to cook for 3-4 minutes.
  5. After the cauliflower florets and peas are cooked thoroughly, add required amount of salt to it and fry them for another 2-3 minutes. Add the fresh coconut flakes and mix them well.
  6. Switch off the flame and garnish the Curry with some coriander leaves.
  7. Serve this simple and nutritious cauliflower curry along with hot rice and Sambar.
Tips/Variations
You can microwave the Cauliflower florets and Peas and then add them into the kadai to quicken the preparation process.