Cheesy Breakfast Hash
Quorn, a readily available vegetarian meat substitute is now offering vegan versionsof their popular meat-free products!
Having tried my share of vegan meats, I can easily say Quorn’s measure up! The texture is spot on—not too chewy, not too tough, and so flavorful. It would please vegans and meat-eaters alike!
The only issue I had with these vegan meats was deciding how I wanted to cook them and what I wanted to enjoy them with.
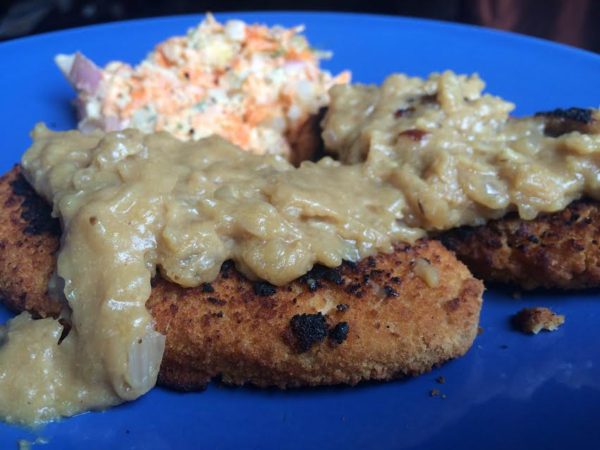
I whipped up some gravy to pair with the Vegan Breaded Chicken/Chik’n Cutlets. I added a side of slaw I had leftover in my fridge, and it was a great, filling meal! These cutlets are the perfect main dish, especially for meat-eaters incorporating more vegan food into their diets.
And with Quorn’s Vegan Chicken/Chik’n Tenders, I put together a delicious, cheesy breakfast hash.
Your stomach is growling now, right? No problem! My tasty hash recipe is listed below.
Before you run out to get yourself these vegan meats, check out the store locator on the Quorn website. You can specify which products you want and locate the stores closest to you that are carrying them.
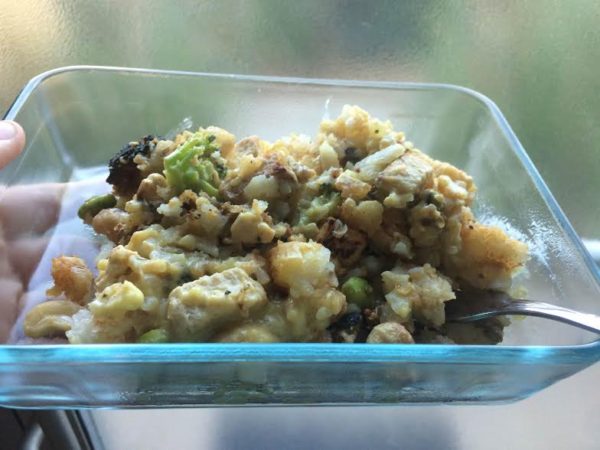
Cheesy Breakfast Hash
Serves about 2.
Ingredients
Hash
- ½ of a 32 oz bag tater tots
- 1 teaspoon vegetable oil
- ½ bag of Quorn Vegan Chicken/Chik’n Tenders
- 2 vegan sausage patties (I used Hilary’s Apple Maple Veggie Breakfast Sausage)
- ½ cup broccoli florets
- ¼ cup edamame
- ¼ cup raw cashews
Cheese Sauce
- 1 cup non-dairy milk
- 1 tablespoon flour
- ¼ cup nutritional yeast
- 1 teaspoon garlic powder
- ½ teaspoon onion powder
- ¼ teaspoon salt
Directions
- Preheat oven and heat tater tots according to instructions on bag.
- While the tots are cooking, heat oil in a large skillet. Add Quorn Vegan Chicken/Chik’n Tenders, vegan sausage, broccoli, and edamame. Cook over medium heat.
- When heated through, add cashews and lower heat.
- Meanwhile, for the cheese sauce, combine milk and flour in a small saucepan over medium heat and mix thoroughly.
- When sauce begins to simmer, reduce heat to low and add nutritional yeast, garlic powder, onion powder, and salt.
- When tater tots are finished cooking, carefully add them and the cheese sauce to the skillet and mix well. Serve hot and enjoy!
also read :


.JPG)


 Boiled Rice / Idly Rice - 1 Cup